| 4th Light Horse Brigade | |
|---|---|
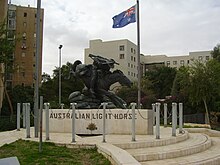
 Australian Light Horse monument at Beersheba Australian Light Horse monument at Beersheba | |
| Active | 1902–1921 |
| Country | |
| Allegiance | |
| Branch | Australian Army |
| Type | Mounted Rifles |
| Size | Cavalry Brigade |
| Part of | Imperial Mounted Division, 1917 Australian Mounted Division, 1917–19. |
| Equipment | Horse, Sword in 1918 |
| Engagements | |
| Insignia | |
| Unit colour patch |  |
The 4th Light Horse Brigade was a mounted infantry brigade of the Australian Imperial Force (AIF) serving in the Middle Eastern theatre of World War I. The brigade was initially formed as a part-time militia formation in the early 1900s in Victoria and Tasmania. After the outbreak of World War I, the brigade was raised as a volunteer formation within the AIF in March 1915 and shipped to Egypt and was broken up in August 1915 to provide dismounted reinforcements to other light horse formations already deployed to Gallipoli. Reformed in February 1917, the brigade was assigned to the Imperial Mounted Division, which formed part of the Egyptian Expeditionary Force, and in June 1917 transferred to the Australian Mounted Division, where it served in the Sinai and Palestine Campaign until the end of the war. After the war, the AIF light horse regiments were demobilised and disbanded; however, the brigade briefly existed as a part-time militia formation in New South Wales until 1921 when its regiments were reorganised into cavalry brigades.
History
Early formation
The 4th Light Horse Brigade was initially raised as part of the militia in the early 1900s, being formed around 1902. That formation had been raised in Victoria and Tasmania, and had consisted of the 10th, 11th and 12th Australian Light Horse Regiments. In 1910, the brigade was reorganised when the 12th was replaced by the 19th Australian Light Horse, which was based in regional Victoria. By 1912, however, the brigade had ceased to exist and the consistent regiments reorganised and dispersed to other formations. The 10th Australian Light Horse became the 13th Light Horse Regiment and was assigned to the 5th Light Horse Brigade, the 19th was reorganised into the 17th Light Horse Regiment and assigned to the 7th Light Horse Brigade, while the 11th Australian Light Horse was split to become the 20th and 29th Light Horse Regiments. The 20th was also assigned to the 7th Light Horse Brigade, while the 29th became the divisional cavalry regiment. At this time, plans were made to re-raise the 4th Light Horse Brigade with the 8th, 10th and 12th Light Horse Regiments, but this did not occur before the war broke out.
World War I

At the outbreak of the war August 1914 the Australian Government decided to raise the Australian Imperial Force (AIF) consisting of 20,000 troops comprising an infantry division and a light horse brigade of three regiments to be used at the discretion of Britain. These regiments were raised from volunteers for overseas service, as the provisions of the Defence Act did not allow conscripts to be deployed overseas. Nevertheless, many of the recruits were drawn from the various militia light horse formations created as a consequence of the Kitchener Report 1910 and the introduction of Universal Training, although they were assigned to freshly raised units that were separate to the light horse regiments raised as part of the militia. Initial enlistments outstripped expectations and as a result, a total of three light horse brigades as well as two divisional cavalry regiments were formed. One of the regiments assigned as divisional cavalry was the 4th Light Horse Regiment, raised in October 1914, which would eventually form part the 4th Light Horse Brigade, although it was not initially assigned to the brigade when it was formed in early 1915.
The AIF 4th Light Horse Brigade came into being in mid-1915, being raised in Australia. Upon establishment, the brigade consisted of the 11th, 12th and 13th Light Horse Regiments, which were raised in March and May 1915. The 11th was drawn from both Queensland and South Australia, while the 12th came predominately from New South Wales, and the 13th was from Victoria. The Aboriginal cavalrymen among them were dubbed the “Queensland Black Watch" by the Australians.
Aden, Egypt and Gallipoli
Under the command of Colonel Reginald Spencer Browne, the brigade embarked for the Middle East between May and June 1915. While en route to Egypt, they were diverted to provide some troops to support the British garrison in Aden, where an Ottoman attack was expected. Brief patrol operations were undertaken, but the attack did not develop and the brigade continued on to Egypt, arriving in July. In Egypt, the brigade undertook further training at Heliopolis Camp. Subsequent embarkations of reinforcements occurred as and when sufficient recruits were gathered and prepared for movement to a war theatre. Meanwhile, the fighting at Gallipoli had seen the deployment of the first three light horse brigades to reinforce the infantry that had landed in April. In July, the decision was made to break up the 4th Light Horse Brigade, and to deploy its regiments as dismounted reinforcements. The 11th and 12th Light Horse Regiments arrived in late August, while the 13th arrived in mid-September. From this time, the three regiments were broken up and provided individual squadrons to the other light horse regiments from the 1st, 2nd and 3rd Light Horse Brigades that were holding the line, having been sent to Gallipoli in May. They subsequently undertook mainly defensive duties in the final stages of the campaign, prior to their withdrawal in late December 1915.
Sinai and Palestine campaign
After returning to Egypt from the Gallipoli campaign the 4th, 11th and 12th Light Horse Regiments remained unbrigaded until the War Office agreed to reform the 4th Light Horse Brigade in January 1917. The brigade would join the 3rd Light Horse Brigade and the British 5th and 6th Mounted Brigades to form the Imperial Mounted Division (later known as the Australian Mounted Division), which formed part of the Egyptian Expeditionary Force. The previously assigned 13th Light Horse Regiment had been deployed to the Western Front in 1916, providing a squadron as divisional cavalry to the 2nd, 4th and 5th Divisions. The brigade's artillery support was provided by the British who assigned A Battery, Honourable Artillery Company from XIX Brigade, Royal Horse Artillery (T.F.).

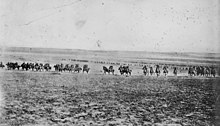
After being re-raised, the brigade took part in the Sinai and Palestine campaign. Its first major action of this campaign came during the Second Battle of Gaza in April 1917. The Ottoman position was located about 3 kilometres (1.9 mi) inland from the coast, around the edge of the dunes. It was strongly defended and despite efforts to reinforce the attack with tanks and gas, the direct attack proved costly and unsuccessful. The brigade's casualties in this battle amounted to 200 men killed or wounded. After this, British planners decided to attempt an indirect approach, focusing their efforts on Beersheba, about 50 kilometres (31 mi) from Gaza. It was here that the 4th Light Horse Brigade fought its most notable action of the war during the Battle of Beersheba on 31 October 1917. During the initial part of the battle, the brigade had been dispersed and barely involved; however, later in the day two of the brigade's regiments – the 4th and 12th – were committed to a charge over open ground, which ultimately breached the Ottoman defences and secured the town's water supply before the wells could be destroyed by the defending troops.
The breakthrough at Beersheba paved the way for the opening of the Southern Palestine Offensive, and on 7 November, the 11th and 12th Light Horse Regiments took part in an attack on Sheria; Ottoman fire proved heavy and the troopers were forced to dismount before the attack was turned back. After Gaza was captured, the brigade took part in the pursuit of the withdrawing Ottoman forces, before the 11th and 12th Light Horse Regiments repelled an Ottoman counterattack in mid-November. Following the capture of Jerusalem, the brigade wintered in Judea, and then moved to Belah, on the coast near Gaza, for rest and training over the course of several months.
In late April 1918, the brigade was deployed into the Jordan Valley and between 29 April and 4 May took part in the raid on Es Salt. Defensive positions were occupied on the western bank of the Jordan River throughout June and July, before the brigade left the Jordan Valley in mid-August. Around this time, the troopers were issued swords and received cavalry training, in preparation for a renewed offensive aimed at capturing Damascus. In mid-September, the brigade took part in the advance towards Semakh and Tiberias and on 25 September the brigade took part in the Battle of Samakh – a minor action that formed part of the Battle of Sharon and the wider Battle of Megiddo – where the 11th Light Horse carried out a mounted charge with drawn swords before dismounting and clearing the town with rifles and bayonets. The 4th and 12th Light Horse were heavily engaged on 30 September, carrying out a charge at Kaukab. The next day, elements of the 4th Light Horse Regiment carried out a patrol to Damascus, while the 12th also entered the town on 2 October. The brigade remained in Damascus for most of October, before joining the final stage of the campaign which saw the brigade begin the advance towards Homs on 27 October. The advance was short lived, as on 30 October the Ottomans surrendered, and the Armistice of Mudros came into effect, bringing an end to the fighting in the theatre.
Disbandment and perpetuation
In November 1918, the brigade was moved to Tripoli, in preparation for a later move to Egypt as part of the demobilisation process. Throughout early 1919, the brigade was occupied with recreational pursuits and educational classes, while the process of returning equipment and mounts began. In late March 1919, elements of the brigade were used to suppress the Egyptian revolt, undertaking patrols and carrying out internal security duties into May. Afterwards, the individual regiments embarked for Australia between June and July 1919, and after which they were disbanded.
Throughout late 1918 and early 1919, the process of demobilising the AIF took place, although this would not be complete until 1921. At this time, the militia formations that had remained in Australia for home service were reorganised to realign them with the recruitment areas that had contributed to the AIF regiments, and to replicate the AIF's organisational structure and designations. These formations had continued to exist alongside the AIF, albeit largely on paper only as they had been reduced significantly due to large-scale enlistment in the AIF, and a lack of funds and resources for training. By 1919, a 4th Light Horse Brigade had been formed in the militia, consisting of the 1st, 7th and 24th Light Horse Regiments, which were based in Parramatta, Goulburn and Wagga Wagga, in New South Wales.
In the first couple of years after the war, plans were made to reorganise the home forces to meet the needs of peacetime while providing a strong base upon which to mobilise if necessary. By 1921, when the AIF was officially disbanded, plans were approved to reorganise the militia to raise two cavalry divisions, each of three brigades, utilising a mix of voluntary enlistment and compulsory service. At this time, the brigades were designated as cavalry brigades, rather than light horse brigades, and the 4th Light Horse Brigade ceased to exist. Within the new structure, the 1st and 7th Light Horse Regiments became part of the 4th Cavalry Brigade, based in New South Wales, while the 24th Light Horse was eventually amalgamated with the 12th and was assigned to the 2nd Cavalry Brigade, also based in New South Wales. The Victorian light horse regiments were organised into the 3rd and 5th Cavalry Brigades at this time.
Composition

During World War I, the 4th Light Horse Brigade consisted of the following:
- 4th Light Horse Regiment (1917–1919)
- 11th Light Horse Regiment (1915, 1917–1919)
- 12th Light Horse Regiment (1915, 1917–1919)
- 13th Light Horse Regiment (1915)
- 4th Light Horse Machine Gun Squadron (1917–1919)
- 4th Light Horse Signal Troop (1917–1919)
- 4th Light Horse Field Ambulance (1917–1919)
- 4th Light Horse Brigade Train (1917–1919)
- 9th Mobile Veterinary Section (1917–1919)
- 4th Light Horse Training Regiment (1917–1918)
- A Battery, Honourable Artillery Company of XIX Brigade, Royal Horse Artillery (T.F.) (1917–1919)
Commanders
The following officers commanded the 4th Light Horse Brigade during the war:
- Colonel Reginald Spencer Browne (1 March 1915 – 24 August 1915)
- Brigadier General John Baldwin Meredith (13 February 1917 – 13 September 1917)
- Brigadier General William Grant (13 September 1917 – June 1919)
See also
References
Citations
- Hall 1968, pp. 61–71.
- Grey 2008, p. 85.
- Bou 2010a, pp. 99 & 141.
- ^ "4th Light Horse Regiment". First World War, 1914–1918 units. Australian War Memorial. Retrieved 6 December 2011.
- ^ Hall 1968, p. 72.
- Hollis 2008, p. 1.
- ^ Bou 2010a, p. 145.
- Hollis 2008, pp. 1–2.
- ^ "11th Light Horse Regiment". First World War, 1914–1918 units. Australian War Memorial. Retrieved 6 December 2011.
- ^ "12th Light Horse Regiment". First World War, 1914–1918 units. Australian War Memorial. Archived from the original on 13 March 2011. Retrieved 12 June 2010.
- ^ "13th Light Horse Regiment". First World War, 1914–1918 units. Australian War Memorial. Archived from the original on 3 November 2013. Retrieved 19 December 2011.
- Aderet, Ofer (26 September 2019). "Israel Honors WWI Australian Aborigine Fighters at Center Near Sea of Galilee". Haaretz. Retrieved 29 September 2019.
- Hollis 2008, pp. 5–8.
- Hollis 2008, p. 9.
- Hollis 2008, pp. 9–25.
- Mallett, Ross. "Australian Mounted Division". AIF Project. University of New South Wales (Australian Defence Force Academy). Archived from the original on 28 February 2015. Retrieved 14 July 2019.
- Falls & MacMunn 1930, pp. 273–274.
- ^ "4th Australian Light Horse Brigade". Australian Light Horse Studies Centre. Retrieved 19 April 2009.
- Bou 2010b, p. 56.
- Coulthard-Clark 1998, p. 126.
- Bou 2010b, p. 34.
- Bou 2010b, p. 41.
- Coulthard-Clark 1998, pp. 134–135.
- Bou 2010b, p. 52.
- Hollis 2008, p. 63.
- Hollis 2008, pp. 65–69.
- Perry 2009, p. 399.
- Hollis 2008, pp. 84–85.
- Hollis 2008, p. 89.
- Hollis 2008, pp. 89–94.
- Grey 2008, p. 125.
- Bou 2010a, pp. 110–111.
- Hall 1968, p. 75.
- Hall 1968, p. 47.
- Bou 2010a, p. 229.
- Hall 1968, pp. 77–78.
- "4th Australian Light Horse Regiment". Australian Light Horse Studies Centre. Retrieved 19 April 2009.
- "11th Australian Light Horse Regiment". Australian Light Horse Studies Centre. Retrieved 19 April 2009.
- "12th Australian Light Horse Regiment". Australian Light Horse Studies Centre. Retrieved 19 April 2009.
- Hollis 2008, pp. 1–7.
Bibliography
- Bou, Jean (2010a). Light Horse: A History of Australia's Mounted Arm. Port Melbourne, Victoria: Cambridge University Press. ISBN 978-0-52119-708-3.
- Bou, Jean (2010b). Australia's Palestine Campaign. Australian Army Campaign Series # 7. Canberra, Australian Capital Territory: Army History Unit. ISBN 978-0-9808100-0-4.
- Coulthard-Clark, Chris (1998). The Encyclopaedia of Australia's Battles (1st ed.). Sydney, New South Wales: Allen & Unwin. ISBN 1-86448-611-2.
- Falls, Cyril; MacMunn, G. (1930). Military Operations Egypt & Palestine from the outbreak of war with Germany to June 1917. Official History of the Great War Based on Official Documents by Direction of the Historical Section of the Committee of Imperial Defence. Vol. 1. London: HM Stationery Office. OCLC 610273484.
- Grey, Jeffrey (2008). A Military History of Australia (3rd ed.). Melbourne, Victoria: Cambridge University Press. ISBN 978-0-521-69791-0.
- Hall, Richard John (1968). The Australian Light Horse. Blackburn, Victoria: W.D. Joynt & Co. OCLC 59504.
- Hollis, Kenneth (2008). Thunder of the Hooves: A History of 12 Australian Light Horse Regiment 1915–1919. Loftus, New South Wales: Australian Military History Publications. ISBN 978-0-9803796-5-5.
- Perry, Roland (2009). The Australian Light Horse. Sydney, New South Wales: Hachette Australia. ISBN 978-0-7336-2272-4.
Further reading
- Gullett, Henry (1941). The Australian Imperial Force in Sinai and Palestine, 1914–1918. Official History of Australia in the War of 1914–1918. Vol. VII (10th ed.). Sydney, New South Wales: Angus & Robertson. OCLC 220624545.
External links
- Australian Light Horse Studies Centre
- 4th Australian Light Horse Brigade
- Australian National Archives – Kitchener Report, 1910 Archived 17 June 2008 at the Wayback Machine
| Australian and New Zealand Army Corps (ANZAC) | |||||
|---|---|---|---|---|---|
| Expeditionary Forces |
| ||||
| Corps | |||||
| Divisions |
| ||||
| Brigades |
| ||||
| |||||
| Australian Light Horse | |
|---|---|
| 1st Light Horse Brigade | |
| 2nd Light Horse Brigade | |
| 3rd Light Horse Brigade | |
| 4th Light Horse Brigade | |
| 5th Light Horse Brigade | |
| Australian Corps troops | |
| Divisions | |