| Battle of Neerwinden | |||||||||
|---|---|---|---|---|---|---|---|---|---|
| Part of the Flanders campaign in the War of the First Coalition | |||||||||
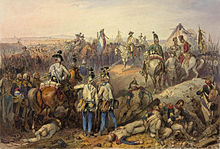 Battle of Neerwinden by Johann Geiger | |||||||||
| |||||||||
| Belligerents | |||||||||
|
|
| ||||||||
| Commanders and leaders | |||||||||
|
|
| ||||||||
| Strength | |||||||||
| 39,000–43,000 | 40,000–47,000 | ||||||||
| Casualties and losses | |||||||||
| 2,859–3,000 | 4,000–5,000 | ||||||||
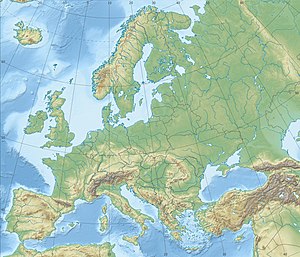 | |||||||||
The Battle of Neerwinden (18 March 1793) saw a Republican French army led by Charles François Dumouriez attack a Coalition army commanded by Prince Josias of Saxe-Coburg-Saalfeld. The Coalition army of the Habsburg monarchy together with a small contingent of allied Dutch Republic troops repulsed all French assaults after bitter fighting and Dumouriez conceded defeat, withdrawing from the field. The French position in the Austrian Netherlands swiftly collapsed, ending the threat to the Dutch Republic and allowing Austria to regain control of its lost province. The War of the First Coalition engagement was fought at Neerwinden, located 57 kilometres (35 mi) east of Brussels in present-day Belgium.
After Dumouriez's victory at Jemappes in November 1792, the French armies rapidly overran most of the Austrian Netherlands. Rather than driving the Austrians to the west bank of the Rhine River, Dumouriez and the French government became preoccupied with a war with the Dutch Republic. During the breathing space offered by her enemy, Austria assembled an army under the Prince of Coburg and struck back. After a French covering force was routed by Coburg at Aldenhoven, Dumouriez began gathering his army for a counterstroke.
Coburg took up a defensive position at Neerwinden and awaited the confident Dumouriez's attack. The Coalition army was outnumbered in infantry but possessed a two-to-one superiority in cavalry. After intense fighting, Coburg's troops repulsed the attacks of the French center and right wing. When Dumouriez found that his left wing was driven off the battlefield, he began retreating. The defeat led to mass desertions from the discouraged French volunteers. In the face of the military collapse, Dumouriez negotiated a free withdrawal of French troops in return for the surrender of Belgium and Dutch territory. Soon, Dumouriez was plotting against his own government and when his plans failed, he defected to the Austrians, leaving the French army in chaos.
Background
French conquer Belgium
On 6 November 1792, a French army under Charles François Dumouriez defeated the Austrian army of Duke Albert of Saxe-Teschen at the Battle of Jemappes. The French enjoyed an enormous numerical superiority with 40,000 infantry, 3,000 cavalry and 100 guns against an Austrian army counting 11,628-foot soldiers, 2,168 horsemen and 56 guns. Within one month the French armies overran most of the Austrian Netherlands, a territory known today as the nation of Belgium. On the right flank, the Army of the Ardennes led by Jean-Baptiste Cyrus de Valence advanced down the Meuse River toward Huy. On the way, Valence dropped off a force under Louis-Auguste Juvénal des Ursins d'Harville to besiege Namur. Dumouriez himself with the Army of Belgium captured Liège. The Army of the North commanded by Francisco de Miranda laid siege to Antwerp. It was joined by a column under Benôit Guérin de Berneron that marched first from Ath northeast to Leuven (Louvain).
Mechelen (Malines) capitulated to Henri Christian Michel de Stengel and 6,000 Frenchmen on 16 November 1792 and its garrison of one battalion of the Austrian Württemberg Infantry Regiment Nr. 38 was allowed to go free. On the 27th Stengel with 8,000 soldiers from the Army of Belgium won a minor action at Voroux-lez-Liers near Liège over Anton Sztáray and four battalions of Austrians. Antwerp fell on 29 November to Miranda's 17,600 infantry and 1,245 cavalry. The Austrian garrison of the 1st Battalion of the Hohenlohe Nr. 17, two companies of the Vierset Nr. 59 and four companies of the Würzburg Infantry Regiments, plus 140 gunners surrendered after losing two dead and four wounded. The French captured 57 cannons, 50 additional 3-pound regimental cannons, 3,150 muskets and 1,523 hundredweight of gunpowder. The 2,599-man garrison of Namur under Johann Dominik von Moitelle surrendered on 2 December to Valence and Harville after a four-week siege. The Austrian defenders included two battalions of the Kinsky Infantry Regiment Nr. 36, one battalion of the Vierset, two companies of the Le Loup Jäger Battalion, a half-squadron of the Esterhazy Hussar Regiment Nr. 32 and 90 gunners. Harville's division counted 13,256 infantry, 1,425 cavalry and 266 artillerists.
Invasion of Dutch Republic and Austrian counterattack
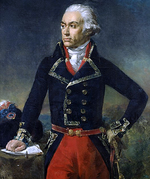
Dumouriez had an opportunity to drive the Austrians from the west bank of the Rhine in conjunction with the Army of the Center. Instead he pursued a pet project of his, the invasion of the Dutch Republic. He hoped to go to war with the Dutch while keeping the Kingdom of Great Britain neutral. But the French government forced his hand, declaring war on Great Britain on 1 February 1793 and ordering him to overrun the Dutch Republic. Dumouriez undertook the invasion with 15,000 infantry and 1,000 cavalry, soon reinforced. Leaving Miranda to besiege Maastricht, covered by Valence's army and Harville's corps, Dumouriez pushed north. At this time the Army of the North counted 18,322 men, the Army of Belgium numbered 30,197, the Army of the Ardennes consisted of 23,479 soldiers, Harville's corps was 12,051 strong, the Army of Holland had 23,244 troops and there were 15,000 men in Belgian garrisons. All told, the strength of the French army in the Low Countries was 122,293 men. The French army became overconfident, believing itself invincible. Meanwhile, the National Convention was riven by bitter political struggles between the moderate Girondists and the extreme Jacobins. During this period the army supply system fell apart through neglect.

Dumouriez crossed the Dutch frontier on 16 February 1793. The fortress of Breda fell after a quick siege from 21 to 24 February 1793. The 3,000 Dutch defenders, which included 2,500 infantry and a dragoon regiment, surrendered the city with its 250 cannon and were allowed to go free. Also on the 21st, Maastricht was invested by 10,000 troops of Miranda's army. There were 8,000 Austrian and Dutch defenders under Prince Karl Wilhelm Georg of Hesse-Darmstadt, an Austrian General-major. The siege work at Maastricht in winter weather was too much for the French volunteers and many deserted their units and went home. The fortress of Geertruidenberg with 150 guns capitulated after a siege from 1 to 4 March. The Dutch garrison of two battalions and two squadrons were allowed to go free. Both Breda and Geertruidenberg had been bluffed into giving up by the military engineer Jean Claude le Michaud d'Arcon, who had designed the floating batteries at the Great Siege of Gibraltar. A small fort at Klundert was captured on 4 March by 4,000 men under Berneron. The tiny garrison put up a stiff fight and lost 60 killed before the 73 survivors gave up.
Poised at the edge of Hollands Diep, Dumouriez planned to cross and march through Rotterdam, Delft, The Hague and Leiden to seize Amsterdam. After capturing Maastricht, Miranda would join him by advancing through Nijmegen and Utrecht. Preoccupied with the Dutch Republic, the French commander had given the Austrians too much time to recover. Prince Josias of Saxe-Coburg-Saalfeld massed an Austrian army on the west bank of the Rhine. He was assisted by a promising staff officer named Karl Mack von Leiberich. On 1 March, Coburg swept aside René Joseph de Lanoue's covering army at the Battle of Aldenhoven. The French abandoned the siege of Maastricht on 3 March. Coburg pursued slowly and the French forces regrouped at Leuven on the 9th. Dumouriez was slow to give up his Dutch project but the French government insisted that he take charge in Belgium. Leaving Louis-Charles de Flers in command of the Army of Holland, Dumouriez arrived at Leuven on 11 March.
Dumouriez thought his soldiers' morale was too shaky for a retreat so he advanced on Coburg's army, seeking battle. In his haste, the French commander failed to call up Harville's corps or the Army of Holland as reinforcements. Earlier, François Joseph Drouot de Lamarche had been driven out of Tienen (Tirlemont), but on 16 March the French recaptured it after a vigorous combat. The French attacked Tienen with 10,000 troops while Archduke Charles, Duke of Teschen defended the town with 6,000 soldiers, six guns and two mortars. French casualties numbered 500 while their opponents sustained losses of 800 killed, wounded and missing. Coburg pulled his army back behind the Little Gete River. Believing that he outnumbered his enemies, Dumouriez was very confident of success. A century before, the French had won the Battle of Landen on the same ground.
Battle
Forces

The strengths given for the two armies vary somewhat. Historian Digby Smith credited the French with between 40,000 and 45,000 men while stating Austro-Dutch numbers as 43,000. Ramsay Weston Phipps asserted that the French had 40,000-foot and 4,500 horse while the Coalition counted 30,000 infantry and 9,000 cavalry. Theodore Ayrault Dodge wrote that Dumouriez put 42,000 infantry and 5,000 cavalry into battle against Coburg's 30,000-foot and 10,000 horse. According to Gunther E. Rothenberg Dumouriez was outnumbered 43,000 to 41,000.
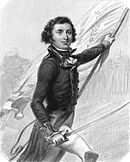
Lamarche's Advance Guard counted 4,000 infantry and 1,000 cavalry. Auguste Marie Henri Picot de Dampierre led the Flankers of the Right, 2,000 infantry and 1,000 cavalry. Valence's Right Wing numbered 7,000 in 18 battalions and was divided into the divisions of Joachim Joseph Neuilly, Alexis Paul Michel Le Veneur and Valence. Duke Louis of Chartres led the Center which included 7,000-foot soldiers in 18 battalions and 1,000 horsemen. The subordinate generals of the Center were Jacques Thouvenot and Dominique Dietmann. Miranda's Left Wing was made up of Jean Alexandre Ihler's 7,000 men and Felix Marie Pierre Chesnon de Champmorin's 5,000 infantry and 1,000 cavalry. Jozef Miaczinsky led the Flankers of the Left, 2,000-foot and 1,000 horse. Jean Nestor de Chancel commanded the eight battalion Reserve in the strength of 4,000 men. These figures total 38,000 infantry and 5,000 cavalry.
The Advance Guard of Archduke Charles with 11 battalions and 11 squadrons was divided into a number of brigades under the command of colonels. Joseph von Gruber commanded two battalions of the Sztáray Infantry Regiment Nr. 33. Stephan von Mihaljevich led three battalions of the Mahony Jägers, one battalion of the O'Donnell Freikorps, 1/3 battalion of the Branovaczky (Serb) Freikorps and one squadron of the Esterhazy Hussar Regiment Nr. 32. Anton Ulrich Joseph von Mylius directed one battalion of the Grün-Laudon Freikorps, 1/3 battalion of Tyrolean Sharpshooters and one squadron of the Esterhazy Hussars. Karl Philipp, Prince of Schwarzenberg directed one and 1/3 battalion of Tyrolean Sharpshooters, one battalion of the O'Donnell Freikorps, 1/3 battalion of the Branovaczky Freikorps and three squadrons of the Uhlan Regiment. Paul De Briey led the Barthodeisky, Briey and Pückler Grenadier battalions and six squadrons of the Esterhazy Hussars.
Joseph de Ferraris led the eight battalions and 16 squadrons of the 1st Rank with Duke Ferdinand Frederick Augustus of Württemberg as his division commander. There were two battalions each of Infantry Regiments Kheul Nr. 10, Wartensleben Nr. 28 and Brentano Nr. 35, one battalion each of the Archduke Charles Nr. 3 and Jordis Nr. 59, six squadrons each of the Kavanagh Nr. 12 and Nassau Nr. 14 Cuirassier Regiments and two squadrons each of the Kaiser Nr. 1 and Duke Albert Nr. 5 Carabinier Regiments. Wenzel Joseph von Colloredo directed the six battalions and 10 squadrons of the 2nd Rank, seconded by division commander Johann Andreas Benjowski and brigadier Franz Vincenz Ferrer von Hoditz und Wolfranitz. The units included two battalions each of Infantry Regiments Brechainville Nr. 25 and Callenberg Nr. 54, one battalion each of the Alton Nr. 15 and Joseph Colloredo Nr. 57, six squadrons of the Zeschwitz Nr. 10 Cuirassiers and two squadrons each of the Karaczay Nr. 18 Chevau-léger and Coburg Nr. 37 Dragoon Regiments.
François Sébastien Charles Joseph de Croix, Count of Clerfayt led 11 battalions and 14 squadrons of the Reserve, with József Alvinczi as his division commander and Johann Nepomuk Gottfried von Lützow as his brigadier. The units were two battalions each of Infantry Regiments Ligne Nr. 30, Esterhazy Nr. 34 and Württemberg Nr. 38, one battalion each of the Murray Nr. 55 and Vierset Nr. 58, the Leuven, Morzin and Rousseau Grenadier battalions, eight squadrons of the Latour Chevau-légers Nr. 31 and six squadrons of the Blankenstein Hussars Nr. 16. The Dutch Republic contributed six battalions, consisting of two battalions each of the Stokkar and Waldeck and one battalion each of the May and Welderen Infantry Regiments.
Combat

Coburg's Advance Guard under Archduke Charles was drawn up on the right flank, Graf Colloredo and the Duke of Württemberg stood in the center and the Count of Clerfayt with the Reserve defended the left flank. The village of Halle was at the far right of the line while Neerwinden village was in the left-center. A screen of Coalition light troops was posted in all the hamlets along the Little Gete. Dumouriez organized eight columns of attack. Valence on the right led three attack columns against Racour and Oberwinden, the Duke of Chartres directed two columns in the center via Laer and Miranda commanded three columns on the left along the main road to Halle. The French reserve formed a final column on the far left where it was to first capture Zoutleeuw (Leau) and then swing south against Halle. Lamarche's Advance Guard operated with the Right Wing.

Dumouriez believed that Coburg would put his main strength on the right wing to protect the Austrian line of communications. Therefore, he planned to throw his heaviest blow against Coburg's left wing. Clerfayt's line stretched from Neerwinden, across Mittelwinden hill to Oberwinden village on the left. Dumouriez directed Valence to outflank Oberwinden with one column, attack Oberwinden frontally with the second and seize the Mittelwinden hill with the third. On Valence's left, Chartres was ordered to attack Neerwinden with his columns. At 7:00 am, the French swarmed across the Little Gete but Valence was unable to capture the Mittelwinden hill until noon. The French seized Racour, Oberwinden and finally Neerwinden.
The Coalition forces launched attack after attack on the villages which were stubbornly defended by the French. Meanwhile, Austrian cavalry charges were highly effective in the open ground between the settlements. After bitter fighting in which Oberwinden and Racour changed hands repeatedly, the two villages and Neerwinden were recaptured by Clerfayt's troops. An Austrian cavalry charge pressed back the French even farther. Dumouriez attempted one more all-out attack with his right but it failed. The French cavalry covered the retreat of the infantry, with Chartres and Valence maintaining a position along the Little Gete.
When Miranda attacked that morning, Coburg's first reaction was to draw substantial troops from his center to reinforce his right flank. Initially, Archduke Charles' men were driven back to Dorsmael but then they held on to the village. The French Reserve captured Leau and threatened Halle but was soon thrown back. The main fighting occurred between 3:00 and 6:00 PM when Miaczinski's column seized Dorsmael but counterattacks drove his soldiers out. Other attacks withered in the face of the strong Coalition defenses. Charles saw an opportunity and hurled his cavalry on the tired French soldiers. The Left Wing became so demoralized that its troops were driven back to Tienen before Miranda could rally them. When Dumouriez heard of the defeat of Miranda's wing on the morning of the 19th he was forced to order a retreat.
Results

On the Coalition side, Mack was given much of the credit for Coburg's triumph. Blamed for the defeat, Miranda traveled to Paris to intrigue against Dumouriez. The Austro-Dutch reported losses of 97 officers, 2,762 rank and file and 779 horses. The French lost 4,000 killed and wounded, plus 1,000 men and 30 artillery pieces captured. General of Brigade Georges Guiscard de Bar was killed and four generals were wounded. Another source estimated Austrian losses as 2,600 killed and wounded and 400 missing while French casualties were 3,000 killed and wounded plus 1,000 missing or prisoners. Immediately after the battle, about 6,000 French volunteers deserted the colors and went home. Three days later, Dumouriez's army only numbered about 20,000 troops as the men deserted in hundreds. On 23 March there was a clash at Pellenberg where Coburg with 38,000 soldiers defeated Dumouriez with 22,000. The Austrians sustained 900 casualties while inflicting 2,000 on the French.
On 24 March the French army retreated through Brussels. Dumouriez began calling in his detachments such as Harville's corps. At this point Dumouriez opened negotiations with the Austrians. He offered to evacuate Belgium if his armies were allowed an unmolested retreat. The terms were accepted and the French armies withdrew to camps behind the border. The Army of Holland was allowed to march through enemy lines and took position near Lille. The Army of the Ardennes was posted at Maulde, the Army of the North at Bruille-Saint-Amand, and the Army of Belgium at Condé-sur-l'Escaut and Valenciennes. Geertruidenberg was evacuated on 2 April and Breda on 3 April.
Dumouriez was a monarchist at heart and he despaired when King Louis XVI went to the guillotine on 21 January 1793. He found the political situation in Paris to be chaotic. He was appalled at the tendency of radicals to interfere with army commanders. Having already negotiated with the enemy, Dumouriez offered to treat and the Austrians sent Mack on 25 March. The French commander proposed to take the army and march on Paris. He would overthrow the National Convention, crush the Jacobins and restore the Constitution of 1791. For their part, the Austrians pledged to halt their advance while he carried out his coup. But Dumouriez moved too slowly. On 1 April, four commissioners and the War Minister Pierre de Ruel, marquis de Beurnonville arrived at his headquarters to demand that the commander explain himself in Paris. They were seized and handed over to the Austrians.
Dumouriez tried to put the frontier fortresses in the hands of his adherents but failed. Miaczinski botched the attempted seizure of Lille and was later executed. Dumouriez believed that he could control the regular infantry and cavalry regiments. On the other hand, the volunteers and the artillery remained devoted to the National Convention. In one incident, Dumouriez was fired on and nearly arrested by Louis-Nicolas Davout's volunteer battalion. He then made the mistake of being seen with an Austrian escort and the gunners took the lead in refusing to obey him. Seeing that his plot had fallen apart, Dumouriez defected to the Austrians on 5 April 1793. He was accompanied by the Duke of Chartres, Valence, several more generals and some cavalry. No longer bound by the previous agreement, Coburg prepared to invade France.
Hitherto the armies had been ruled and directed by officers. Now begins the Revolutionary nightmare.
Ironically, the treason and defection of Dumouriez gave the Jacobins full scope to take control of the armies. Before Neerwinden, the army obeyed its commanders. Afterward, the representatives on mission were given extraordinary powers over army commanders. The generals might pay with their lives for defeat, but the real authority lay with the political operatives. Meanwhile, the new War Minister sent his agents to spy on the generals. These men were quick to report any complaint against officers, which could result in disgrace or execution. Elements of this system stayed in force even after Maximilien Robespierre was overthrown and guillotined.
References
Citations
- Smith 1998, p. 31.
- Phipps 2011, p. 145.
- Smith 1998, pp. 33–34.
- Smith 1998, p. 32.
- ^ Phipps 2011, p. 152.
- Phipps 2011, p. 151.
- Rothenberg 1980, p. 34.
- ^ Phipps 2011, p. 153.
- ^ Smith 1998, p. 42.
- ^ Smith 1998, p. 43.
- Smith & Kudrna
- ^ Phipps 2011, p. 154.
- ^ Phipps 2011, p. 155.
- ^ Dodge 2011, p. 101.
- ^ Smith 1998, p. 44.
- ^ Rothenberg 1980, p. 247.
- Dodge 2011, p. 101. This source places Colloredo in the first line, Württemberg in the second line and does not mention Ferraris. See Smith's order of battle listed under Forces.
- ^ Rickard 2009.
- ^ Dodge 2011, p. 103.
- ^ Phipps 2011, p. 156.
- Phipps 2011, pp. 160–161.
- Phipps 2011, p. 157.
- Phipps 2011, pp. 158–160.
- ^ Phipps 2011, p. 162.
- ^ Phipps 2011, p. 161.
- Phipps 2011, pp. 166–167.
- Phipps 2011, pp. 168–169.
- Phipps 2011, p. 169.
Sources
- Dodge, Theodore Ayrault (2011). Warfare in the Age of Napoleon: The Revolutionary Wars Against the First Coalition in Northern Europe and the Italian Campaign, 1789–1797. USA: Leonaur Ltd. ISBN 978-0-85706-598-8.
- Phipps, Ramsay Weston (2011). The Armies of the First French Republic: Volume I The Armée du Nord. USA: Pickle Partners Publishing. ISBN 978-1-908692-24-5.
- Rickard, J. (2009). "Battle of Neerwinden, 18 March 1793". historyofwar.org. Retrieved 1 September 2014.
- Rothenberg, Gunther E. (1980). The Art of War in the Age of Napoleon. Bloomington, Ind.: Indiana University Press. ISBN 0-253-31076-8.
- Schels, J. B. (1808). "Schlacht von Neerwinden am 18.3.1793 in Österreichische Militärische Zeitschrift" (in German). Vienna: Kriegsarchiv.
- Smith, Digby (1998). The Napoleonic Wars Data Book. London: Greenhill. ISBN 1-85367-276-9.
- Smith, Digby; Kudrna, Leopold. "Biographical Dictionary of all Austrian Generals during the French Revolutionary and Napoleonic Wars, 1792–1815: Hessen-Darmstadt, Karl Wilhelm Georg Landgraf zu". napoleon-series.org. Retrieved 4 September 2014.
- von Zeissberg, Heinrich Ritter (1892). Aldenhofen, Neerwinden, Löwen (1.,18.,22.März 1793), zur Erinnerung an Erzherzog Carl (in German). Vienna: Tempsky.
External links
- Broughton, Tony (2006). "Generals Who Served in the French Army during the Period 1789–1815". The Napoleon Series. Retrieved 21 November 2012. This source is useful for finding the full names and dates of promotion of French generals.
 Media related to Battle of Neerwinden (1793) at Wikimedia Commons
| Preceded by War in the Vendée |
French Revolution: Revolutionary campaigns Battle of Neerwinden |
Succeeded by Battle of Famars |
Categories: