| Bombardment of Great Yarmouth and Lowestoft | |||||||
|---|---|---|---|---|---|---|---|
| Part of the First World War | |||||||
 North Sea | |||||||
| |||||||
| Belligerents | |||||||
|
|
| ||||||
| Commanders and leaders | |||||||
|
|
| ||||||
| Casualties and losses | |||||||
|
25 killed 19 wounded 2 light cruisers damaged 1 submarine sunk 200 houses shelled |
11 killed 1 cruiser damaged 1 submarine sunk 1 submarine captured | ||||||
The Bombardment of Yarmouth and Lowestoft, often referred to as the Lowestoft Raid, was a naval battle fought during the First World War between the German Empire and the British Empire in the North Sea.
The German fleet sent a battlecruiser squadron with accompanying cruisers and destroyers, commanded by Rear Admiral Friedrich Boedicker, to bombard the coastal ports of Yarmouth and Lowestoft. Although the ports had some military importance, the main aim of the raid was to entice defending ships to sail, which could then be picked off, either by the battlecruiser squadron or by the full High Seas Fleet, which was stationed at sea ready to intervene. The result was inconclusive: nearby British forces were too small to challenge the German force and largely kept clear of the German battlecruisers, the German ships withdrew before the British fast response battlecruiser squadron or the Grand Fleet could arrive.
Background

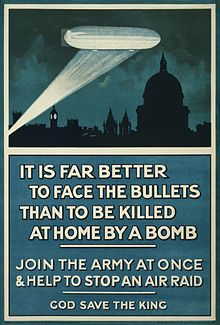
In February 1916, Admiral Reinhard Scheer became commander-in-chief of the German High Seas Fleet and commenced a new campaign against the Royal Navy. An important part of his strategy was to make raids into British waters to lure British forces into battle, in conditions advantageous to the Germans. A proposal was made to bombard towns on the east coast of England at daybreak on 25 April along with air raids by Zeppelins the night before, would provoke British ships to respond. The raid was timed to coincide with the expected Easter Rebellion by Irish nationalists, who had requested German assistance.
Immediately before the raid, the German Navy believed that the British had strong forces in the North Sea, off Norway and off the south-east coast of England. The Germans intended to sneak out between the two forces to bombard the English coast and then attack whichever British force appeared first. With luck, the German battlecruisers could engage the south-east force and after defeating it would run back to the north-west, meeting the northern group in the area around Terschelling Bank. Here the battlecruisers would attack the second British group from the south and the main body of the High Seas Fleet would attack from the north. If successful, the High Seas Fleet would destroy significant elements of the British fleet before the main body of the British Grand Fleet could assist, reducing or eliminating the Royal Navy's numerical superiority. If the British did not take the bait, then merchant ships could be captured and British units off the coast of Belgium destroyed.
The forces sighted by Germany in the North Sea had been part of a raid launched on 22 April, to draw out the German fleet but this did not go to plan. The battlecruisers HMAS Australia and HMS New Zealand had collided in fog off Denmark, causing serious damage to both ships. Later, the battleship HMS Neptune collided with a merchant steamer and three destroyers were also damaged in collisions. The mission had been abandoned and the ships returned north to port; on 24 April the main body of the Grand Fleet was near its bases of Rosyth for the battlecruiser squadron and Scapa Flow for the remainder of the Grand Fleet.
Prelude
Lowestoft and Great Yarmouth were selected as the targets of the German bombardment. Lowestoft was a base of operations for minelaying and sweeping, while Yarmouth was a base for the submarines that disrupted German movements in the Heligoland Bight. The destruction of the harbours and other military establishments of both towns would assist the German war effort, even if the raid failed to bait the British heavy units. Eight Zeppelin airships would, after dropping their bombs, provide reconnaissance for the battlecruisers, which would conduct rescue operations, should an airship be lost over the water. Two U-boats were sent ahead to Lowestoft, while others were stationed off or mined the Firth of Forth, Scotland.
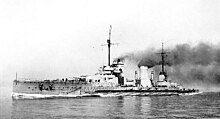
The 1st Scouting Group, consisting of the battlecruisers SMS Seydlitz, Lützow, Derfflinger, Moltke and Von der Tann (Rear-Admiral Boedicker), would be supported by the four light cruisers of the 2nd Scouting Group and the fast torpedo boat flotillas VI and IX, with their two command light cruisers. The Main Fleet, consisting of Squadrons I, II and III, Scouting Division IV and the remainder of the torpedo flotillas, was to accompany the battlecruisers to the Hoofden, until the bombardment was over, to protect them against superior enemy forces.
Raid


At noon on 24 April, German forces were in place and the operation began. The route led around British minefields to the English coast and was intended to put the bombardment group off Lowestoft and Yarmouth at daybreak, where they would bombard the towns for 30 minutes. At 16:00, the battlecruiser Seydlitz—in the vanguard of the reconnaissance force—struck a mine just north-west of Norderney, in an area swept the night before. She was forced to turn back with a flooded torpedo compartment from a 50 ft (15 m) hole on the starboard side, being only able to make 15 kn (17 mph; 28 km/h) with 1,400 short tons (1,300 t) of water on board and 11 men killed. While the rest of the squadron was stopped for Boedicker to transfer to Lützow and for Seydlitz to escape the minefield, the German ships sighted and avoided torpedoes from one or more British submarines. Seydlitz returned to the river Jade, accompanied by two destroyers and Zeppelin L-7. To avoid other possible mines and submarines, the battlecruiser force altered course to a route along the coast of East Friesland. This had previously been avoided, because in the clear weather the ships risked being sighted from the islands of Rottum and Schiermonnikoog and their movements reported to the British. It was assumed that the British would now be alerted to the movements of the German ships.
The British already knew that the German fleet had sailed at midday. More information arrived at 20:15, when an intercepted wireless message gave the information that they were headed for Yarmouth. At 15:50, the British fleet had been placed on two hours readiness and at 19:05 were ordered to sail south from Scapa Flow. Around midnight, the Harwich Force (Commodore Reginald Tyrwhitt) of three light cruisers and 18 destroyers was ordered to move north.
Around 20:00, German ships received a message from the Naval Staff, that a large British fleet was operating off the Belgian coast and that another large force had been sighted off Norway on 23 April. This suggested that the British Fleet was still divided, giving rise to optimism that the operation would go off as planned, despite the mining of Seydlitz. At 21:30, another message indicated that British patrol boats off the Belgian coast were heading back to harbour, which was interpreted as confirmation that British submarines had reported the German movements. By 24 April the northern British ships had returned to harbour for coaling and were unaware of the moves. The ships off the Flanders coast included 12 additional destroyers from the Harwich Force, which had been sent to assist with a barrage of the coast.

The German airships, having dropped their bombs, returned to the bombardment force. Visibility over land was poor, the winds were unfavourable and the towns were better defended than had been thought. The Zeppelins that had bombed Norwich, Lincoln, Harwich and Ipswich had been fired on by British ships but none had been damaged. At about 03:50, the light cruiser SMS Rostock, one of Boedicker's screen ships, sighted British ships in a west-southwest direction. Tyrwhitt reported the sighting of four battlecruisers and six cruisers to the Grand Fleet. He turned away south, attempting to draw the German ships after him away from Lowestoft but they did not follow. The four battlecruisers opened fire upon Lowestoft at 04:10 for 10 minutes, destroying 200 houses and two defensive gun batteries, injuring 12 people and killing three. The ships then moved off to Yarmouth but fog made it difficult to see the target. Only a few shells were fired before reports arrived that a British force had engaged the remainder of the German ships and the battlecruisers broke off to rejoin them.

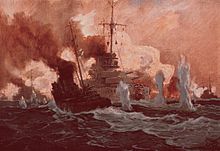
When he found he could not draw the German ships away, Tyrwhitt had returned and engaged the six light cruisers and escorts but broke off the action when seriously outgunned after the battlecruisers returned. The light cruisers Rostock and Elbing had tried to lead the British ships into the waiting guns of the battlecruisers but upon sighting the German capital ships, the British cruisers turned south. The German battlecruisers opened fire, causing severe damage to the cruiser HMS Conquest, the destroyer HMS Laertes and slightly damaging one light cruiser. Conquest was hit by a shell, which reduced her speed and produced 40 casualties. Boedicker failed to follow the retreating ships, assuming they were faster and probably concerned whether other, larger vessels might be about. The Germans ceased fire and turned north-west towards the rendezvous off Terschelling Bank, hoping the British cruisers would follow, which they did not.
During the bombardment of the two coastal towns, the light cruiser SMS Frankfurt sank an armed patrol steamer, while the leader of Torpedo-boat Flotilla VI, SMS G41 sank the trawler King Stephen, of the earlier King Stephen Incident. The crews were rescued and taken prisoner and around 07:30, the German Naval Staff passed on reports from Flanders of intercepted wireless transmissions instructing British ships to coal and then proceed to Dunkirk. Tyrwhitt attempted to follow the German squadron at a distance. At 08:30, he had located smoke from the ships, but was ordered to abandon the chase and return home. The Grand Fleet had encountered heavy seas and made slow progress coming south, leaving its destroyers behind because of the weather. At 11:00, the Admiralty ordered the chase to be abandoned, at which point the main part of the fleet was 150 mi (130 nmi; 240 km) behind the British battlecruiser squadron, which had started out from further south. The two battlecruiser squadrons came within 50 mi (43 nmi; 80 km) of each other but did not meet.
Aftermath
Analysis

As the German ships headed for home, they avoided submarine attacks, encountering only two neutral steamers and some fishing vessels. The operation had been almost a complete failure, sinking two patrol craft and damaging one cruiser and one destroyer, in exchange for serious damage to a battlecruiser, while the damage done to the naval establishments at Yarmouth and Lowestoft was light. The German battlecruiser squadron had failed to take advantage of its superior numbers to engage the British light cruisers and destroyers present at Lowestoft. The German U-boats sent out to intercept British ships leaving harbour had not found any targets. Nor had six British submarines stationed off Yarmouth and six more off Harwich. One German submarine was destroyed and another captured when it became beached at Harwich. The British submarine HMS E22 was sunk, torpedoed by the German submarine SM UB-18. The British felt obliged to take steps to react more quickly to future raids. The 3rd Battle Squadron, consisting of seven King Edward VII-class battleships, was moved from Rosyth to the Thames, together with HMS Dreadnought. The presence of these ships on the Thames was given later as one reason the Harwich destroyers were not permitted to join the Grand Fleet at the Battle of Jutland: they were held back to escort the battleships should they be called upon to take part.
Casualties
The raid infuriated the British and it damaged German prestige in world public opinion, as the operation brought back memories of the "baby killer" raids earlier in the war. British casualties were 21 British servicemen, who were killed at sea. A serviceman and three civilians were killed and 19 were wounded at Lowestoft.
See also
- Raid on Scarborough, Hartlepool and Whitby (1914)
- Raid on Yarmouth (1914)
References
- Marder, The War Years, p. 420.
- ^ Scheer ch.9
- ^ Massie, Castles of Steel, p. 558.
- Massie, Castles of Steel, p. 557.
- ^ Marder. The War Years, p. 424.
- 'Castles' p. 557
- 'Castles' p. 559
- Marder II, 1965, p. 425
- ^ Marder, The War Years, p. 425.
- Marder, The War Years, p. 426.
- ^ 'Castles' p.559
- Marder, The War Years, p. 427.
- Marder III p. 45
- Jarvis, 2013, p. 83.
Bibliography
- Jarvis, Robert B. (2013). The Bombardment of Lowestoft and Great Yarmouth by the Germans, 25th April 1916. Lowestoft: Lowestoft War Memorial Museum. ISBN 978-0-9571769-2-8.
- Marder, Arthur J. (1965). From the Dreadnought to Scapa Flow, The Royal Navy in the Fisher Era, 1904–1919: The War Years to the eve of Jutland: 1914–1916. Vol. II. London: Oxford University Press. OCLC 865180297.
- Massie, Robert K. (2003). Castles of Steel. New York: Ballantine. ISBN 0-345-40878-0.
- Scheer, Reinhard (2010) . Germany's High Sea fleet in the War (HathiTrust Digital Library ed.). New York: Peter Smith. OCLC 681271085. Retrieved 15 July 2017.
External links
52°36′N 1°42′E / 52.6°N 1.7°E / 52.6; 1.7
Categories:- North Sea operations of World War I
- Naval battles of World War I involving the United Kingdom
- Naval battles of World War I involving Germany
- 1916 in England
- Conflicts in 1916
- Great Yarmouth
- Lowestoft
- Battles involving Norfolk
- Military history of Suffolk
- 20th century in Norfolk
- 20th century in Suffolk
- Maritime incidents in England
- April 1916 events
- Germany–United Kingdom military relations
- Naval bombing operations and battles