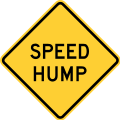
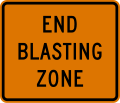
Road and traffic signs utilized in the United States

In the United States, road signs are, for the most part, standardized by federal regulations, most notably in the Manual on Uniform Traffic Control Devices (MUTCD) and its companion volume the Standard Highway Signs (SHS).
Adoption and compliance

Adopted national MUTCD Adopted national MUTCD with state supplement Adopted state-specific MUTCD
The 11th edition of the MUTCD was released on December 19, 2023. The effective date, 30 days after publication, of the MUTCD was January 18, 2024. States have two years after the effective date to do one of the following options: adopt the revised MUTCD, adopt the revised MUTCD with a state supplement, or adopt a state-specific MUTCD.
Eighteen states use the manual without alterations; 22 states, the District of Columbia, and Puerto Rico have adopted it in conjunction with a supplemental volume; and ten states have a state version in substantial conformance to the MUTCD. The MUTCD and SHS establish seven categories of signs for road and highway use, as follows: (The list does not cover all situations; the signage is from the national MUTCD unless specified):
Regulatory signs
R1 series: Stop and yield
-
 R1-1
R1-1
Stop -
 R1-2
R1-2
Yield -
 R1-2aP
To oncoming traffic (plaque) -
 R1-2bP
To traffic in circle (plaque) -
 R1-2cP
To all lanes (plaque) -
 R1-3
R1-3
4-way (plaque) -
 R1-3P
R1-3P
All way (plaque) -
 R1-5R
R1-5R
Yield here to pedestrians (right) -
 R1-5L
R1-5L
Yield here to pedestrians (left) -
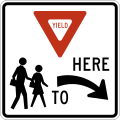 R1-5aR
Yield here to school crossing (right) -
 R1-5aL
Yield here to school crossing (left) -
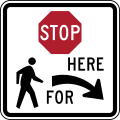 R1-5bR
Stop here for pedestrians (right) -
 R1-5bL
Stop here for pedestrians (left) -
 R1-5cR
Stop here for school crossing (right) -
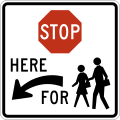 R1-5cL
Stop here for school crossing (left) -
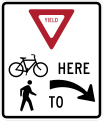 R1-5dR
Yield here to trail crossing (right) -
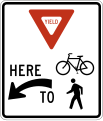 R1-5dL
Yield here to trail crossing (left) -
 R1-5eR
Stop here for trail crossing (right) -
 R1-5eL
Stop here for trail crossing (left) -
 R1-6
R1-6
In-street pedestrian crossing -
 R1-6
R1-6
In-street pedestrian crossing -
 R1-6a
R1-6a
In-street pedestrian crossing -
 R1-6a
R1-6a
In-street pedestrian crossing -
 R1-6b
R1-6b
In-street school crossing -
 R1-6c
R1-6c
In-street school crossing -
 R1-6d
R1-6d
In-street trail crossing -
 R1-6d
R1-6d
In-street trail crossing -
 R1-7
R1-7
Wait on stop -
 R1-7a
R1-7a
Wait on stop - Go on slow -
 R1-8
R1-8
Go on slow -
 R1-9
R1-9
Overhead pedestrian crossing -
 R1-9
R1-9
Overhead pedestrian crossing -
 R1-9a
R1-9a
Overhead pedestrian crossing -
 R1-9a
R1-9a
Overhead pedestrian crossing -
 R1-9b
R1-9b
Overhead school crossing -
 R1-9b
R1-9b
Overhead school crossing -
 R1-10P
Except right turn (plaque)
R2 series: Speed limit
-
 R2-1
R2-1
Speed limit -
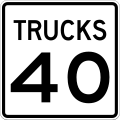 R2-2P
R2-2P
Truck speed limit (plaque) -
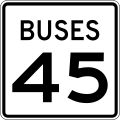 R2-2aP
Buses speed limit (plaque) -
 R2-2bP
Trucks and buses speed limit (plaque) -
 R2-2cP
Vehicles over 5 tons speed limit (plaque) -
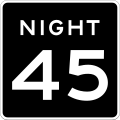 R2-3P
R2-3P
Night speed limit (plaque) -
 R2-4P
R2-4P
Minimum speed limit (plaque) -
 R2-4a
R2-4a
Combined speed limit -
 R2-5P
R2-5P
Unless otherwise posted (plaque) -
 R2-5aP
Citywide (plaque) -
 R2-5bP
Neighborhood (plaque) -
 R2-5cP
Residental (plaque) -
 R2-6P
R2-6P
Fines higher (plaque) -
 R2-6aP
Fines double (plaque) -
 R2-6bP
Speeding fine (plaque) -
 R2-10
R2-10
Begin higher/double fines zone -
 R2-11
R2-11
End higher/double fines zone -
 R2-12
R2-12
End work zone speed limit -
 R2-13
R2-13
End variable speed limit -
 R2-14
R2-14
End truck speed limit
R3 series: Lane usage and turns
-
 R3-1
R3-1
No right turn -
 R3-1a
R3-1a
No right turn for train (Activated, Blank-Out) -
 R3-1b
R3-1b
No right turn for trucks -
 R3-1c
R3-1c
No right turn for trucks and buses -
 R3-1d
R3-1d
No right turn for trucks over 4 tons -
 R3-1e
R3-1e
No right turn except buses -
 R3-1f
R3-1f
No right turn except buses and taxis -
 R3-1g
R3-1g
No right turn (times and days) (2-lines) -
 R3-1h
R3-1h
No right turn (times and days) (3-lines) -
 R3-1h
R3-1h
No right turn (times and days) (3-lines) -
 R3-2
R3-2
No left turn -
 R3-2a
R3-2a
No left turn for train (Activated, Blank-Out) -
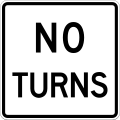 R3-3
R3-3
No turns -
 R3-4
R3-4
No U-turn -
 R3-5R
R3-5R
Right turn only -
 R3-5L
R3-5L
Left turn only -
 R3-5a
R3-5a
Straight through only -
 R3-5bP
Left lane (plaque) -
 R3-5cP
Hov 2+ (plaque) -
 R3-5dP
Taxi lane (plaque) -
 R3-5fP
Right lane (plaque) -
 R3-5gP
Bus lane (plaque) -
 R3-5hP
Bike lane (plaque) -
 R3-6R
R3-6R
Optional movement lane control, straight through and right turn -
 R3-6L
R3-6L
Optional movement lane control, straight through and left turn -
 R3-6a
R3-6a
Optional movement lane control, U or left turn -
 R3-6b
R3-6b
Optional movement lane control, double left turns -
 R3-7R
R3-7R
Right lane must turn right -
 R3-7L
R3-7L
Left lane must turn left -
 R3-7aP
Except buses (plaque) -
 R3-7bP
Except bicycles (plaque) -
 R3-8R
R3-8R
Advance intersection lane control (two lanes) (right) -
 R3-8L
R3-8L
Advance intersection lane control (two lanes) (left) -
 R3-8aR
Advance intersection lane control (three lanes) (right) -
 R3-8aL
Advance intersection lane control (three lanes) (left) -
 R3-8b
R3-8b
Advance intersection lane control (three lanes) -
 R3-8xa
Advance intersection lane control with bike lane -
 R3-8xb
Advance intersection lane control with bike lane -
 R3-8xc
Advance intersection lane control with bike lane -
 R3-8zd
Advance circular intersection lane control (2 lanes) -
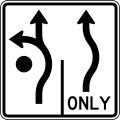 R3-8ze
Advance circular intersection lane control (2 lanes) -
 R3-8zf
Advance circular intersection lane control (2 lanes) -
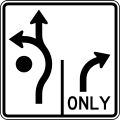 R3-8zg
Advance circular intersection lane control (2 lanes) -
 R3-9a
R3-9a
Two-way left turn only (overhead) -
 R3-9b
R3-9b
Two-way left turn only (post-mounted) -
 R3-9cP
Begin (plaque) -
 R3-9dP
End (plaque) -
 R3-9e
R3-9e
Reversible lane control (overhead) -
 R3-9f
R3-9f
Reversible lane control (post-mounted) -
 R3-9g
R3-9g
Advance reversible lane control transition -
 R3-9h
R3-9h
Advance reversible lane control transition -
 R3-9i
R3-9i
End reverse lane -
 R3-10
R3-10
HOV 2+ only, 2 or more persons per vehicle (post-mounted) -
 R3-10a
ILEV allowed (post-mounted) -
 R3-11
R3-11
HOV 2+ only (times and days) (post-mounted) -
 R3-11a
2 right lanes, HOV 2+ only (times and days) (post-mounted) -
 R3-11b
HOV 2+ only (full-time) (post-mounted) -
 R3-11c
2 right lanes, HOV 2+ only (full-time) (post-mounted) -
 R3-11d
Right lane, buses only (times and days) (post-mounted) -
 R3-11e
Right lane, buses only (full-time) (post-mounted) -
 R3-11f
Shoulder, buses only (times and days) (post-mounted) -
 R3-11g
Shoulder, buses and right turns only (times and days) (post-mounted) -
 R3-11hP
Motorcycles allowed (plaque) -
 R3-12
R3-12
HOV 2+ lane ahead (post-mounted) -
 R3-12a
HOV lane ends (post-mounted) -
 R3-12b
HOV lane ends (distance) (post-mounted) -
 R3-12c
HOV restriction ends (post-mounted) -
 R3-12d
HOV restriction ends (distance) (post-mounted) -
 R3-12e
Left lane, HOV 2+ only (distance) (post-mounted) -
 R3-12f
Bus lane ahead (post-mounted) -
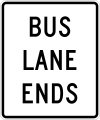 R3-12g
Bus lane ends (post-mounted) -
 R3-12h
Bus lane ends (distance) (post-mounted) -
 R3-13
R3-13
HOV 2+ only, 2 or more persons per vehicle (overhead) -
 R3-13a
HOV 2+ only, 2 or more persons per vehicle (times and days) (overhead) -
 R3-14
R3-14
HOV 2+ only (times and days) (1-line) (overhead) -
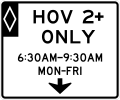 R3-14a
HOV 2+ only (times and days) (2-lines) (overhead) -
 R3-14b
HOV 2+ only (full-time) (overhead) -
 R3-14c
Buses and taxis only (times and days) (overhead) -
 R3-15
R3-15
HOV 2+ lane ahead (overhead) -
 R3-15a
HOV 2+ only begins (distance) (overhead) -
 R3-15b
HOV lane ends (overhead) -
 R3-15c
HOV restriction ends (overhead) -
 R3-15d
Bus lane ahead (overhead) -
 R3-15e
Bus lane ends (overhead) -
 R3-17
R3-17
Bike lane -
 R3-17aP
Ahead (plaque) -
 R3-17bP
Ends (plaque) -
 R3-18
R3-18
No U or left turn -
 R3-19
R3-19
Lane for left turn only -
 R3-19a
Lane for U turn only -
 R3-19b
Lane for U and left turns only -
 R3-20R
Begin right turn lane -
 R3-20L
Begin left turn lane -
 R3-23
R3-23
All turns from right lane (used at jug handles) -
 R3-23a
U turn from right lane (used at jug handles) -
 R3-24
R3-24
All turns (diagonal right arrow) (used at jug handles) -
 R3-24a
U and left turns (diagonal right arrow) (used at jug handles) -
 R3-24b
U turn (diagonal right arrow) (used at jug handles) -
 R3-25
R3-25
All turns (right arrow) (used at jug handles) -
 R3-25a
U and left turns (right arrow) (used at jug handles) -
 R3-25b
U turn (right arrow) (used at jug handles) -
 R3-26
R3-26
U and left turns (straight arrow) (used at jug handles) -
 R3-26a
U turn (straight arrow) (used at jug handles) -
 R3-27
R3-27
No straight through -
 R3-28
R3-28
Toll pricing -
 R3-29P
Pay Toll (plaque) -
 R3-30P
Take Ticket (plaque) -
 R3-31
R3-31
Electronic Toll Collection Pass Only -
 R3-32P
No Cash (plaque) -
 R3-33R
Right lane must exit -
 R3-33L
Left lane must exit -
 R3-33aR
Right lane must exit -
 R3-33aL
Left lane must exit -
 R3-40
R3-40
HOV 2+, 2 or more persons per vehicle (post-mounted) -
 R3-42
R3-42
Express lane ends (post-mounted) -
 R3-42a
Express lane ends (distance) (post-mounted) -
 R3-42b
Express restriction ends (post-mounted) -
 R3-42c
Express restriction ends (distance) (post-mounted) -
 R3-43
R3-43
HOV 2+, 2 or more persons per vehicle (overhead) -
 R3-44
R3-44
Toll Road Pass Only (Overhead) -
 R3-44a
Toll Road Pass or High Occupancy Vehicle (HOV) (Overhead) -
 R3-44b
Express lane only (Overhead) -
 R3-45
R3-45
Express lane ends (Overhead) -
 R3-45a
Express restriction ends (Overhead) -
 R3-48
R3-48
Toll Costs on Express Lane (Overhead) -
 R3-48a
Toll Costs on Express Lane or HOV (Overhead) -
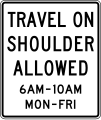 R3-51
R3-51
Travel on shoulder allowed (times and days) -
 R3-51aP
No trucks (plaque) -
 R3-51bP
No trucks or buses (plaque) -
 R3-51cP
Emergency stopping only other times (plaque) -
 R3-51d
Travel on shoulder allowed when flashing -
 R3-51e
Travel on shoulder on green arrow only -
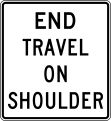 R3-52
R3-52
End travel on shoulder -
 R3-52a
Travel on shoulder ends (distance) -
 R3-52b
Shoulder must exit (distance) -
 R3-52c
Travel on shoulder begins (distance) -
 R3-56
R3-56
Begin exit lane -
 R3-57P
To traffic on shoulder (plaque)
R4 series: Regulation of movement
-
 R4-1
R4-1
Do not pass -
 R4-2
R4-2
Pass with care -
 R4-3
R4-3
Slower traffic keep right -
 R4-4
R4-4
Begin right turn lane yield to bikes -
 R4-5
R4-5
Trucks use right lane -
 R4-7
R4-7
Keep right -
 R4-7a
R4-7a
Keep right -
 R4-7b
R4-7b
Keep right -
 R4-7c
R4-7c
Keep right of obstacle -
 R4-8
R4-8
Keep left -
 R4-8a
R4-8a
Keep left -
 R4-8b
R4-8b
Keep left -
 R4-8c
R4-8c
Keep left of obstacle -
 R4-9
R4-9
Stay in lane -
 R4-9a
R4-9a
Stay in lane to merge point -
 R4-10
R4-10
Runaway vehicles only -
 R4-12
R4-12
Slow vehicles with five or more following vehicles must use turn-out -
 R4-13
R4-13
Slow vehicles must use turn-out ahead -
 R4-14
R4-14
Slow vehicles must turn out -
 R4-16
R4-16
Keep right except to pass -
 R4-17
R4-17
Do not drive on shoulder -
 R4-18
R4-18
Do not pass on shoulder -
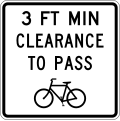 R4-19
R4-19
Bicycle passing clearance -
 R4-20R
All traffic must turn right -
 R4-20L
All traffic must turn left -
 R4-21R
Right turn only -
 R4-21L
Left turn only
R5 series: Exclusionary
-
 R5-1
R5-1
Do not enter -
 R5-1a
R5-1a
Wrong way -
 R5-1b
R5-1b
Wrong way for bicycles -
 R5-2
R5-2
No trucks -
 R5-2aP
Except local delivery (plaque) -
 R5-2b
R5-2b
No thru trucks -
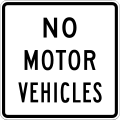 R5-3
R5-3
No motorized vehicles -
 R5-4
R5-4
No commercial vehicles -
 R5-5
R5-5
No lugged vehicles -
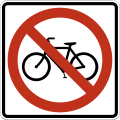 R5-6
R5-6
No bicycles -
 R5-7
R5-7
No non-motorized traffic -
 R5-8
R5-8
No motor-driven cycles -
 R5-10
R5-10
No pedestrians, bicycles or motor-driven cycles -
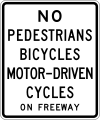 R5-10a
No pedestrians, bicycles or motor-driven cycles on freeway -
 R5-10b
No pedestrians or bicycles -
 R5-10c
No pedestrians -
 R5-10dP
On freeway (plaque) -
 R5-11
R5-11
No unauthorized vehicles -
 R5-12
R5-12
No thru traffic
R6 series: One way and divided highway
-
 R6-1R
R6-1R
One way (right) -
 R6-1L
R6-1L
One way (left) -
 R6-2R
R6-2R
One way (with arrow) (right) -
 R6-2L
R6-2L
One way (with arrow)
(left) -
 R6-3
R6-3
Divided highway crossing -
 R6-3a
R6-3a
Divided highway crossing, T-intersection -
 R6-5P
R6-5P
Roundabout circulation (plaque) -
 R6-6
R6-6
Begin one way -
 R6-7
R6-7
End one way
R7 series: Parking
-
 R7-1
R7-1
No parking any time -
 R7-2
R7-2
No parking (times) -
 R7-2a
R7-2a
No parking (times) (alternative) -
 R7-3
R7-3
No parking except Sundays and Holidays -
 R7-4
R7-4
No standing any time -
 R7-4a
R7-4a
No stopping any time -
 R7-5
R7-5
One hour parking -
 R7-6
R7-6
No parking, loading zone -
 R7-8
R7-8
Reserved parking (wheelchair) -
 R7-8aP
Van accessible (plaque) -
 R7-9
R7-9
No parking, bike lane -
 R7-9a
R7-9a
No parking, bike lane -
 R7-10
R7-10
Back-in parking only -
 R7-20
R7-20
Parking fee station -
 R7-21
R7-21
Two hour metered parking (times and days) -
 R7-21aP
Parking payments (plaque) -
 R7-22
R7-22
Metered parking (times and days) -
 R7-107
No parking, bus stop -
 R7-107a
No parking, bus stop -
 R7-107b
No parking, bus stop with transit pictograph -
 R7-108
Two hour parking (times) -
 R7-111
No parking, except electric vehicles -
 R7-111a
No parking, (times) except electric vehicles -
 R7-112
Two hour parking, electric vehicles only -
 R7-112a
Two hour parking, electric vehicles only (times) -
 R7-112b
Two hour parking, electric vehicles only (times and days) -
 R7-113
No parking, except while charging -
 R7-113aP
Vehicle must be plugged in (plaque) -
 R7-113bP
Vacate stall when charging completed (plaque) -
 R7-114
Two hour, vehicle charging only -
 R7-114a
45 minute, vehicle charging only (times) -
 R7-114b
45 minute, vehicle charging only (times and days) -
 R7-200
No parking and one hour parking (times) (combined) -
 R7-200a
No parking and one hour parking (times) (combined) -
 R7-201P
Tow away zone -
 R7-201aP
Tow away zone (plaque) -
 R7-202P
This side of sign (plaque) -
 R7-203
Snow emergency route, no parking during snow emergency, tow-away zone
R8 series: Parking and emergency restrictions
-
 R8-1
R8-1
No parking on pavement -
 R8-2
R8-2
No parking except on shoulder -
 R8-3
R8-3
No parking -
 R8-3a
R8-3a
No parking (text) -
 R8-3c
R8-3c
No parking on pavement -
 R8-3d
R8-3d
No parking on bridge -
 R8-3e
R8-3e
No parking on tracks -
 R8-3f
R8-3f
No parking except on shoulder -
 R8-4
R8-4
Emergency parking only -
 R8-5
R8-5
No stopping on pavement -
 R8-6
R8-6
No stopping except on shoulder -
 R8-7
R8-7
Emergency stopping only -
 R8-8
R8-8
Do not stop on tracks -
 R8-9
R8-9
Tracks out of service -
 R8-10
R8-10
Stop here when flashing -
 R8-10a
Stop here when flashing (alternative)
R9 series: Bicycles and pedestrians
-
 R9-1
R9-1
Walk on left facing traffic -
 R9-2
R9-2
Cross only at cross walks -
 R9-3
R9-3
No pedestrians crossing (symbol) -
 R9-3a
R9-3a
No pedestrians crossing -
 R9-3bP
Use crosswalk (plaque) -
 R9-3cP
Ride with traffic (plaque) -
 R9-4
R9-4
No hitchhiking (symbol) -
 R9-4a
R9-4a
No hitchhiking -
 R9-5
R9-5
Bicycles use pedestrian signal -
 R9-6
R9-6
Bicycles yield to pedestrians -
 R9-7
R9-7
Bicycles left, Pedestrians right -
 R9-8
R9-8
Pedestrian Crosswalk -
 R9-9
R9-9
Sidewalk Closed -
 R9-10
R9-10
Sidewalk Closed Use Other Side -
 R9-11
R9-11
Sidewalk Closed Ahead Cross Here -
 R9-11a
Sidewalk Closed Cross Here -
 R9-12
R9-12
Bike lane closed -
 R9-13
R9-13
No skaters -
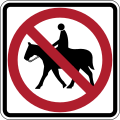 R9-14
R9-14
No equestrians -
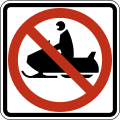 R9-15
R9-15
No snowmobiles -
 R9-16
R9-16
No all-terrain vehicles -
 R9-19P
Except on shoulder (plaque) -
 R9-20
R9-20
Bicycles allowed use of full lane -
 R9-21
R9-21
Bicycles use shoulder only -
 R9-22
R9-22
Bicycles must exit -
 R9-23
R9-23
Bicycle all turns from bike lane -
 R9-23a
Bicycle left turn from bike lane -
 R9-23b
Bicycle left turn must use turn box -
 R9-23c
Bicycle left turn must use turn box -
 R9-24
R9-24
Bicycle all turns (diagonal right arrow) -
 R9-24a
Bicycle all turns (right arrow) -
 R9-25
R9-25
Bicycle U and left turns (diagonal right arrow) -
 R9-25a
Bicycle U and left turns (right arrow) -
 R9-25b
Bicycle U and left turns (straight arrow) -
 R9-26
R9-26
Bicycle U turn (diagonal right arrow) -
 R9-26a
Bicycle U turn (right arrow) -
 R9-26b
Bicycle U turn (straight arrow) -
 R9-27
R9-27
Bicycle left turn (diagonal right arrow) -
 R9-27a
Bicycle left turn (right arrow) -
 R9-27b
Bicycle left turn (straight arrow)
R10 series: Traffic signal
-
 R10-1
R10-1
Cross only on green -
 R10-2
R10-2
Cross only on pedestrian signal -
 R10-3
R10-3
Push button for pedestrian signal -
 R10-3a
Push button to cross street, wait for pedestrian signal -
 R10-3b
Crosswalk signal instructions -
 R10-3c
Crosswalk signal instructions -
 R10-3d
Crosswalk signal instructions -
 R10-3e
Crosswalk signal instructions -
 R10-3f
Crosswalk signal instructions -
 R10-3g
Crosswalk signal instructions -
 R10-3h
Crosswalk signal instructions -
 R10-3i
Crosswalk signal instructions -
 R10-4
R10-4
Push button for green -
 R10-4a
Push button to cross street, wait for green -
 R10-5
R10-5
Left on green arrow only -
 R10-6
R10-6
Stop here on red -
 R10-6aR
Stop here on red (alternative) (right) -
 R10-6aL
Stop here on red (alternative) (left) -
 R10-7
R10-7
Do not block intersection -
 R10-8
R10-8
Use lane with green arrow -
 R10-10R
Right turn signal -
 R10-10L
Left turn signal -
 R10-10a
U turn Signal -
 R10-10bR
Right lane signal -
 R10-10bL
Left lane Signal -
 R10-10cR
Right turn lane signal -
 R10-10cL
Left turn lane signal -
 R10-11
No turn on red -
 R10-11a
No turn on circular red -
 R10-11b
No turn on red -
 R10-11c
No turn on red except from right lane -
 R10-11d
No turn on red from this lane -
 R10-12
Left turn yield on green -
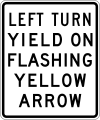 R10-12a
Left turn yield on flashing yellow arrow -
 R10-12b
Left turn yield to bicycle -
 R10-13
Emergency signal -
 R10-14
Emergency signal - stop on flashing red -
 R10-14a
Emergency signal - stop on flashing red (overhead) -
 R10-14b
Stop here on flashing red -
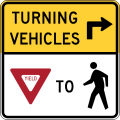 R10-15R
Turning vehicles yield to pedestrians (right)
-
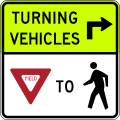 Turning vehicles yield to pedestrians (right)
-
 R10-15L
Turning vehicles yield to pedestrians (left)
-
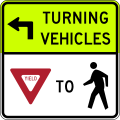 Turning vehicles yield to pedestrians (left)
-
 R10-15a
Turning vehicles stop for pedestrians
-
 R10-16
U-turn yield to right turn -
 R10-17a
Right on red arrow after stop -
 R10-18
Traffic laws photo enforced -
 R10-18a
Traffic signal photo enforced -
 R10-19P
Photo enforced (symbol) (plaque) -
 R10-19aP
Photo enforced (plaque) -
 R10-20aP
Days & times (plaque) (for use with R10-11 series) (3 lines) -
 R10-20aP
Days & times (plaque) (for use with R10-11 series) (2 lines) -
 R10-22
Bicycles to request green wait on line -
 R10-23
Crosswalk - stop on red -
 R10-23a
Stop on red - yield on flashing red after stop -
 R10-24
Bicycle push button for green light -
 R10-25
Push button for warning lights - wait for gap in traffic -
 R10-26
Bicycle push button for green light with arrow -
 R10-27
Left turn yield on flashing red arrow after stop -
 R10-28
One vehicle per green -
 R10-29
1 vehicle per green each lane -
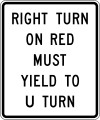 R10-30
Right turn on red must yield to U-turn -
 R10-31P
At signal (plaque) -
 R10-32P
Push button for 2 seconds for extra crossing time -
 R10-40
Bicycle signal mandatory movement (turn) -
 R10-40a
Bicycle signal mandatory movement (thru) -
 R10-41
Bicycle signal optional movement (thru and turn) -
 R10-41a
Bicycle signal optional movement (left and right turns) -
 R10-41b
Bicycle signal optional movement (all) -
 R10-41c
Bicycle signal optional movement (left and thru)
R11 series: Road closed
-
 R11-1
R11-1
Keep off median -
 R11-2
R11-2
Road closed -
 R11-2a
Street closed -
 R11-2b
Bridge out -
 R11-2c
Path closed -
 R11-3
R11-3
Road closed (distance) miles ahead, local traffic only -
 R11-3a
Street closed (distance) miles ahead, local traffic only -
 R11-3b
Bridge out (distance) miles ahead, local traffic only -
 R11-4
R11-4
Road closed to thru traffic
R12 series: Weight limits
-
 R12-1
R12-1
Weight limit -
 R12-2
R12-2
Axle weight limit -
 R12-4
R12-4
Weight limit with per axle and gross -
 R12-5
R12-5
Weight limit with truck symbols -
 R12-6
R12-6
Weight limit with special hauling vehicles -
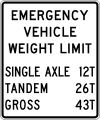 R12-7
R12-7
Emergency vehicle weight limit -
 R12-7aP
Emergency vehicle weight limit (plaque)
R13 series: Weigh stations
R14 series: Truck routes
-
 R14-1
R14-1
Truck route sign -
 R14-2
R14-2
Hazardous material route -
 R14-3
R14-3
Hazardous material prohibited -
 R14-4
R14-4
National Network Route -
 R14-5
R14-5
National Network prohibited
R15 series: Rail and light rail
-
 R15-1
R15-1
Railroad crossing (crossbuck) -
 R15-2P
Number of tracks -
 R15-3P
Vehicles required to stop are exempt from this regulation -
 R15-4a
Light rail only in right lane -
 R15-4b
Light rail only in left lane -
 R15-4c
Light rail only in center lane -
 R15-5
R15-5
Do not pass stopped trains -
 R15-5a
Do not pass stopped train -
 R15-6
R15-6
Do not drive on tracks -
 R15-6a
Do not drive on tracks -
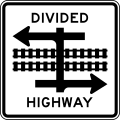 R15-7
R15-7
Divided highway transit rail crossing -
 R15-7a
Divided highway transit rail crossing (T-intersection) -
 R15-8
R15-8
Look both ways at track
R16 series: Seat belts and headlight use
-
 R16-3
R16-3
Move over or reduce speed for vehicles stopped on shoulder -
 R16-4
R16-4
Minor crashes, move vehicles from travel lanes -
 R16-5
R16-5
Lights on when using wipers -
 R16-6
R16-6
Lights on when raining -
 R16-7
R16-7
Turn on headlights next (distance) miles -
 R16-8
R16-8
Turn on headlights -
 R16-9
R16-9
Check headlights -
 R16-10
Begin daytime headlight section -
 R16-11
End daytime headlight section -
 R16-15
No hand-held phone use by driver -
 R16-15a
No hand-held phone use by driver
R22 series: Blasting zones
School signs
-
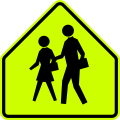 S1-1
S1-1
School Crossing -
 S3-1
S3-1
School bus stop ahead -
 S3-2
S3-2
School bus turn ahead -
 S4-1P
S4-1P
Times of day (plaque) -
 S4-2P
S4-2P
When children are present (plaque) -
 S4-3P
S4-3P
School (plaque) -
 S4-4P
S4-4P
When flashing (plaque) -
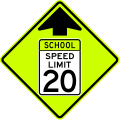 S4-5
S4-5
School speed limit ahead -
 S4-5a
S4-5a
School speed zone ahead -
 S4-6P
S4-6P
Days of week (plaque) -
 S4-7P
S4-7P
All year (plaque) -
 S5-1
S5-1
School speed limit when flashing -
 S5-2
S5-2
End school zone (usually under an R2 speed limit sign) -
 S5-3
S5-3
End school speed limit
Warning signs
W1 series: Horizontal alignment
-
 W1-1R
W1-1R
Turn (right) -
 W1-1L
W1-1L
Turn (left) -
 CW1-1R
Turn (right) -
 CW1-1L
Turn (left) -
 W1-2R
W1-2R
Curve (right) -
 W1-2L
W1-2L
Curve (left) -
 CW1-2R
Curve (right) -
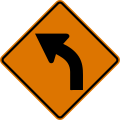 CW1-2L
Curve (left) -
 W1-3R
W1-3R
Reverse turn (right) -
 W1-3L
W1-3L
Reverse turn (left) -
 CW1-3R
Reverse turn (right) -
 CW1-3L
Reverse turn (left) -
 W1-4R
W1-4R
Reverse curve (right) -
 W1-4L
W1-4L
Reverse curve (left) -
 CW1-4R
Single lane shift (right) -
 CW1-4L
Single lane shift (left) -
 CW1-4bR
Double lane shift (right) -
 CW1-4bL
Double lane shift (left) -
 CW1-4cR
Triple lane shift (right) -
 CW1-4cL
Triple lane shift (left) -
 W1-5R
W1-5R
Winding road (right) -
 W1-5L
W1-5L
Winding road (left) -
 W1-6R
W1-6R
Arrow (right) -
 W1-6L
W1-6L
Arrow (left) -
 CW1-6R
Arrow (right) -
 CW1-6L
Arrow (right) -
 W1-7
W1-7
Two-direction large arrow -
 W1-8R
W1-8R
Chevron (right) -
 W1-8L
W1-8L
Chevron (left) -
 CW1-8R
Chevron (right) -
 CW1-8L
Chevron (left) -
 W1-10R
Curve with side road (right) -
 W1-10L
Curve with side road (left) -
 W1-10aR
Curve with crossroad (right) -
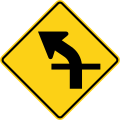 W1-10aL
Curve with crossroad (left) -
 W1-10bR
Curve with tangent (right) -
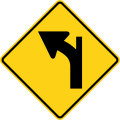 W1-10bL
Curve with tangent (left) -
 W1-10cR
Curve with tangent from side (right) -
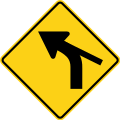 W1-10cL
Curve with tangent from side (left) -
 W1-10dR
Reverse curve with side road (right) -
 W1-10dL
Reverse curve with side road (left) -
 W1-10eR
Reverse curve with crossroad (right) -
 W1-10eL
Reverse curve with crossroad (left) -
 W1-11R
Hairpin curve (right) -
 W1-11L
Hairpin curve (left) -
 W1-13R
Truck rollover warning (right) -
 W1-13L
Truck rollover warning (left) -
 W1-15R
270 degree loop curve (right) -
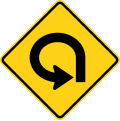 W1-15L
270 degree loop curve (left)
W2 series: Intersections
-
 W2-1
W2-1
Crossroad -
 W2-2R
W2-2R
Side road (right) -
 W2-2L
W2-2L
Side road (left) -
 W2-3R
W2-3R
Side road at an acute angle (right) -
 W2-3L
W2-3L
Side road at an acute angle (left) -
 W2-3aR
Side road at an obtuse angle (right) -
 W2-3aL
Side road at an obtuse angle (left) -
 W2-4
W2-4
T-intersection -
 W2-5
W2-5
Y-intersection -
 W2-6
W2-6
Roundabout -
 W2-7R
W2-7R
Offset side roads (right and left) -
 W2-7L
W2-7L
Offset side roads (left and right) -
 W2-8R
W2-8R
Double side roads (right) -
 W2-8L
W2-8L
Double side roads (left) -
 W2-10
W2-10
Traffic Entering When Flashing -
 W2-11
W2-11
Traffic Approaching When Flashing
W3 series: Advance traffic control
-
 W3-1
W3-1
Stop sign ahead -
 CW3-1
CW3-1
Stop sign ahead -
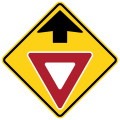 W3-2
W3-2
Yield sign ahead -
 CW3-2
CW3-2
Yield sign ahead -
 W3-3
W3-3
Traffic light ahead -
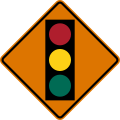 CW3-3
CW3-3
Traffic light ahead -
 W3-4
W3-4
Be prepared to stop -
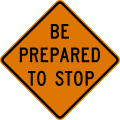 CW3-4
CW3-4
Be prepared to stop -
 W3-5
W3-5
Speed limit ahead -
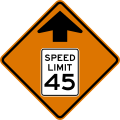 CW3-5
CW3-5
Speed limit ahead -
 W3-5a
W3-5a
Speed zone ahead -
 CW3-5a
Speed zone ahead -
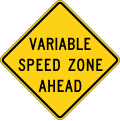 W3-5b
W3-5b
Variable Speed Zone Ahead -
 W3-5c
W3-5c
Truck Speed Zone Ahead -
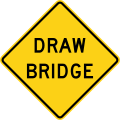 W3-6
W3-6
Draw bridge ahead -
 W3-7
W3-7
Ramp meter ahead -
 W3-8
W3-8
Ramp metered when flashing -
 W3-9
W3-9
Traffic Using Shoulder (times and days)
W4 series: Lanes and merges
-
 W4-1R
W4-1R
Merge (right) -
 W4-1L
W4-1L
Merge (left) -
 CW4-1R
Merge (right) -
 CW4-1L
Merge (left) -
 W4-2R
W4-2R
Lane ends (right) -
 W4-2L
W4-2L
Lane ends (left) -
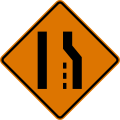 CW4-2R
Lane ends (right) -
 CW4-2L
Lane ends (left) -
 W4-3R
W4-3R
Added right lane -
 W4-3L
W4-3L
Added left lane -
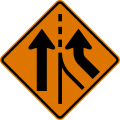 CW4-3R
Added right lane -
 CW4-3L
Added left lane -
 W4-4P
W4-4P
Cross traffic does not stop (plaque) -
 W4-4aPR
Traffic from right does not stop (plaque) -
 W4-4aPL
Traffic from left does not stop (plaque) -
 W4-4bP
Oncoming traffic does not stop (plaque) -
 W4-5R
W4-5R
Merge right (entering roadway) -
 W4-5L
W4-5L
Merge left (entering roadway) -
 CW4-5R
Merge right (entering roadway) -
 CW4-5L
Merge left (entering roadway) -
 W4-5aP
No merge area (plaque) -
 CW4-5aP
No merge area (plaque) -
 W4-6R
W4-6R
Added right lane (entering roadway) -
 W4-6L
W4-6L
Added left lane (entering roadway) -
 CW4-6R
Added right lane (entering roadway) -
 CW4-6L
Added left lane (entering roadway) -
 W4-7R
W4-7R
Heavy merge from right -
 W4-7L
W4-7L
Heavy merge from left -
 W4-8
W4-8
Single lane transition
W5 series: Road width restrictions
-
 W5-1
W5-1
Road narrows -
 CW5-1
CW5-1
Road narrows -
 W5-2
W5-2
Narrow bridge -
 CW5-2
CW5-2
Narrow bridge -
 W5-2a
W5-2a
Narrow Underpass -
 W5-3
W5-3
One lane bridge -
 CW5-3
CW5-3
One lane bridge -
 W5-3a
W5-3a
One lane underpass -
 W5-4
W5-4
Ramp narrows -
 CW5-4
CW5-4
Ramp narrows -
 W5-4a
W5-4a
Path narrows
W6 series: Divided highway
-
 W6-1
W6-1
Divided highway begins -
 CW6-1
CW6-1
Divided highway begins -
 W6-2
W6-2
Divided highway ends -
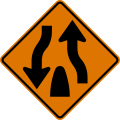 CW6-2
CW6-2
Divided highway ends -
 W6-3
W6-3
Two-way traffic -
 CW6-3
CW6-3
Two-way traffic -
 CW6-4
CW6-4
Narrow two-way traffic -
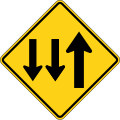 W6-5
W6-5
Two-way traffic (3-Lane, two lanes in the opposing direction) -
 W6-5a
W6-5a
Two-way traffic (3-Lane, one lane in the opposing direction)
W7 series: Hills
-
 W7-1
W7-1
Steep grade/hill -
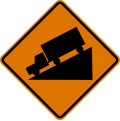 CW7-1
CW7-1
Steep grade/hill -
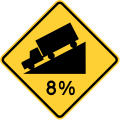 W7-1a
W7-1a
Steep grade/hill percentage -
 W7-2P
W7-2P
Use low gear -
 W7-2bP
Trucks use lower gear -
 W7-3P
W7-3P
(percent) grade ahead -
 W7-3aP
Next (distance) miles ahead -
 CW7-3aP
Next (distance) miles ahead -
 W7-3bP
(percent) grade (distance) miles ahead -
 W7-4
W7-4
Runaway truck ramp (distance) -
 W7-4b
W7-4b
Runaway truck ramp -
 W7-4c
W7-4c
Truck escape ramp -
 W7-4dP
Sand -
 W7-4eP
Gravel -
 W7-4fP
Paved -
 W7-5
W7-5
Hill (bicycle) -
 W7-6
W7-6
Hill blocks view
W8 series: Pavement and roadway conditions
-
 W8-1
W8-1
Bump -
 CW8-1
CW8-1
Bump -
 W8-2
W8-2
Dip -
 CW8-2
CW8-2
Dip -
 W8-3
W8-3
Pavement ends -
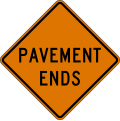 CW8-3
CW8-3
Pavement ends -
 W8-4
W8-4
Soft shoulder -
 CW8-4
CW8-4
Soft shoulder -
 W8-5
W8-5
Slippery when wet ahead -
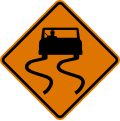 CW8-5
CW8-5
Slippery when wet ahead -
 W8-5P
W8-5P
When wet (plaque) -
 W8-5aP
Ice (plaque) -
 W8-5bP
Steel deck (plaque) -
 W8-5cP
Excess oil (plaque) -
 W8-6
W8-6
Truck crossing -
 CW8-6
CW8-6
Truck crossing -
 W8-7
W8-7
Loose gravel -
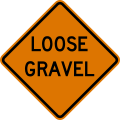 CW8-7
CW8-7
Loose gravel -
 W8-8
W8-8
Rough road -
 CW8-8
CW8-8
Rough road -
 W8-9
W8-9
Low shoulder -
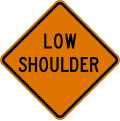 CW8-9
CW8-9
Low shoulder -
 W8-10
W8-10
Bicycle slippery when wet ahead -
 W8-10P
Slippery when wet (plaque) -
 W8-11
W8-11
Uneven lanes -
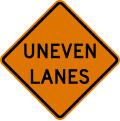 CW8-11
Uneven lanes -
 W8-12
W8-12
No center line -
 CW8-12
No center line -
 W8-13
W8-13
Bridge ices before road -
 W8-14
W8-14
Fallen rocks -
 CW8-14
Fallen rocks -
 W8-15
W8-15
Grooved pavement -
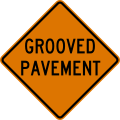 CW8-15
Grooved pavement -
 W8-15aP
Motorcycle (plaque) -
 CW8-15aP
Motorcycle (plaque) -
 W8-16
W8-16
Metal bridge deck -
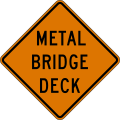 CW8-16
Metal bridge deck -
 W8-17L
Left shoulder drop-off ahead -
 W8-17R
Right shoulder drop-off ahead -
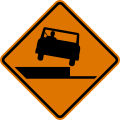 CW8-17R
Right shoulder drop-off ahead -
 W8-17P
Shoulder drop-off (plaque) -
 CW8-17P
Shoulder drop-off (plaque) -
 W8-18
W8-18
Road may flood -
 CW8-18
Road may flood -
 W8-19
W8-19
Depth gauge -
 W8-21
W8-21
Gusty Winds Area -
 W8-22
W8-22
Fog area -
 W8-23
W8-23
No shoulder ahead -
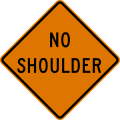 CW8-23
No shoulder ahead -
 CW8-24
Steel plate ahead -
 W8-25
W8-25
Shoulder ends -
 CW8-25
Shoulder ends -
 W8-26
W8-26
Road Ends (distance) -
 W8-26a
Street Ends (distance)
W9 series: Lane transitions
-
 W9-1R
W9-1R
Right lane ends -
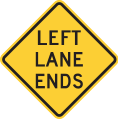 W9-1L
W9-1L
Lane lane ends -
 CW9-1R
Right lane ends -
 CW9-2a
Merge here take turns -
 CW9-3
CW9-3
Interior lane shift ahead -
 W9-4
W9-4
Lanes Merge -
 W9-5
W9-5
Bicycle Lane Ends -
 W9-5a
W9-5a
Bicycles Merging -
 CW9-5a
Bicycles Merging -
 W9-6
W9-6
Pay toll (distance) cars (price) -
 W9-6a
W9-6a
Stop Ahead Pay Toll Cars (price) -
 W9-6bP
Pay toll (distance) cars (price) (plaque) -
 W9-6cP
Stop Ahead Pay Toll (Plaque) -
 W9-6dP
Stop Ahead Pay Toll (plaque) -
 W9-6e
W9-6e
Take Ticket (distance) -
 W9-6f
W9-6f
Stop Ahead Take Ticket -
 W9-6gP
Take Ticket (distance) (plaque) -
 W9-6hP
Stop Ahead Take Ticket (plaque) -
 W9-7R
W9-7R
Right lane for exit only -
 W9-7L
W9-7L
Left lane for exit only
W10 series: Railroad crossings
-
 W10-1
W10-1
Railroad crossing ahead -
 W10-1aP
Exempt (plaque) -
 W10-2R
Crossroads with parallel tracks (right) -
 W10-2L
Crossroads with parallel tracks (left) -
 W10-3R
Side road with parallel tracks (right) -
 W10-3L
Side road with parallel tracks (left) -
 W10-4R
T intersection with parallel tracks (right) -
 W10-4L
T intersection with parallel tracks (left) -
 W10-5
W10-5
Low ground clearance railroad crossing -
 W10-5P
Low ground clearance plaque -
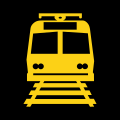 W10-7
W10-7
Light rail transit approaching sign (Activated, blank-out) -
 W10-8
W10-8
Trains may exceed (speed) -
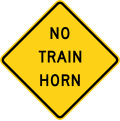 W10-9
W10-9
No train horn warning -
 W10-9P
No train horn plaque -
 W10-11
Storage space symbol -
 W10-11a
XX feet between tracks and highway -
 W10-11b
XX feet between highway and tracks behind you -
 W10-12R
Skewed crossing ahead (right) (this supplements the w10-1 sign but does not replace it) -
 W10-12L
Skewed crossing ahead (left) (this supplements the W10-1 sign but does not replace it) -
 W10-13P
No gates or lights (plaque) -
 W10-14P
Next crossing (plaque) -
 W10-14aP
Use next crossing (plaque) -
 W10-15P
Rough crossing (plaque) -
 W10-16
Another train coming (Activated, Blank-Out) -
 W10-21
Busway Crossing -
 W10-21aP
Signal Ahead (plaque)
W11 series: Advance warnings
-
 W11-1
W11-1
Bicycle -
 W11-1
W11-1
Bicycle -
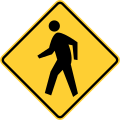 W11-2
W11-2
Pedestrians -
 W11-2
W11-2
Pedestrians -
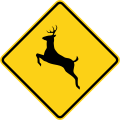 W11-3
W11-3
Deer -
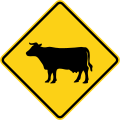 W11-4
W11-4
Cattle -
 W11-5
W11-5
Farm vehicles -
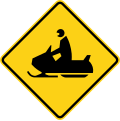 W11-6
W11-6
Snowmobile -
 W11-7
W11-7
Equestrian -
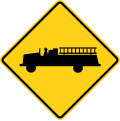 W11-8
W11-8
Emergency vehicle -
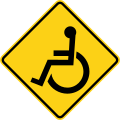 W11-9
W11-9
Handicapped -
 W11-9
W11-9
Handicapped -
 W11-10
Truck -
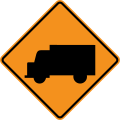 CW11-10
Truck -
 W11-11
Golf cart -
 W11-12P
Emergency signal ahead (plaque) -
 W11-14
Horse-drawn vehicles -
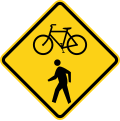 W11-15
Bicycle and pedestrians -
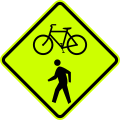 W11-15
Bicycle and pedestrians -
 W11-15P
Trail x-ing (plaque) -
 W11-15P
Trail x-ing (plaque) -
 W11-15a
Trail crossing -
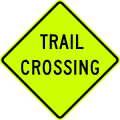 W11-15a
Trail crossing -
 W11-16
Bear -
 W11-17
Sheep -
 W11-18
Ram -
 W11-19
Donkey -
 W11-20
Elk -
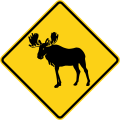 W11-21
Moose -
 W11-22
Wild horse
W12 series: Low clearance warnings
-
 W12-1
W12-1
Double arrow -
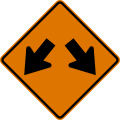 CW12-1
Double arrow -
 W12-2
W12-2
Low clearance -
 CW12-2
Low clearance -
 W12-2a
Low Clearance (Overhead) -
 W12-2b
Low Clearance (Overhead)
W13 series: Advisory speeds
-
 W13-1P
Speed advisory -
 CW13-1P
Speed advisory -
 W13-1aP
Speed advisory Confirmation (plaque) -
 W13-2
W13-2
Exit speed advisory -
 W13-3
W13-3
Ramp speed advisory -
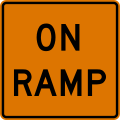 CW13-4P
On ramp (plaque) -
 W13-6
W13-6
Exit speed advisory (270 degree loop curve) -
 W13-7
W13-7
Ramp speed advisory (270 degree loop curve) -
 W13-8
W13-8
Exit speed advisory (hairpin curve) -
 W13-9
W13-9
Ramp speed advisory (hairpin curve) -
 W13-10
Exit speed advisory (turn) -
 W13-11
Ramp speed advisory (turn) -
 W13-12
Exit speed advisory (truck rollover) -
 W13-13
Ramp speed advisory (truck rollover) -
 W13-20
Variable Speed Feedback -
 W13-20aP
Variable Speed Feedback (plaque)
W14 series: Dead end streets and no passing zones
-
 W14-1
W14-1
Dead end -
 W14-1aR
Dead end on the right -
 W14-1aL
Dead end on the left -
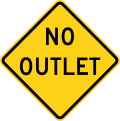 W14-2
W14-2
No outlet -
 W14-2aR
No outlet on the right -
 W14-2aL
No outlet on the left -
 W14-3
W14-3
No passing zone -
 CW14-3
No passing zone
W15 series: Playgrounds
-
 W15-1
W15-1
Playground -
 W15-1
W15-1
Playground
W16 series: Supplemental plaques
-
 W16-1P
In Road (plaque) -
 W16-1aP
In Street (plaque) -
 W16-2P
(distance) feet -
 CW16-2P
(distance) feet -
 W16-2P
(distance) feet -
 W16-2aP
(distance) feet -
 W16-2aP
(distance) feet -
 W16-3P
(distance) miles -
 W16-3aP
(distance) miles -
 W16-4P
Next (distance) feet -
 W16-5PR
Supplemental arrow to the right (plaque) -
 W16-5PR
Supplemental arrow to the right (plaque) -
 W16-5PL
Supplemental arrow to the left (plaque) -
 W16-5PL
Supplemental arrow to the left (plaque) -
 W16-6PR
Supplemental arrow to the right (plaque) -
 W16-6PR
Supplemental arrow to the right (plaque) -
 W16-6PL
Supplemental arrow to the left (plaque) -
 W16-6PL
Supplemental arrow to the left (plaque) -
 W16-7PR
Downward diagonal arrow to the right (plaque) -
 W16-7PR
Downward diagonal arrow to the right (plaque) -
 W16-7PL
Downward diagonal arrow to the left (plaque) -
 W16-7PL
Downward diagonal arrow to the left (plaque) -
 W16-7aP
Dual Downward Diagonal Arrow (plaque) -
 W16-8P
Advance Street Name Plaque -
 W16-8aP
Advance Street Name Plaque (double arrow) -
 W16-9P
Ahead -
 W16-9P
Ahead -
 W16-10P
Photo enforced (symbol) -
 W16-10aP
Photo enforced -
 W16-11P
HOV -
 W16-12P
Traffic circle plaque -
 W16-12aP
Roundabout junction plaque -
 W16-13P
When flashing -
 W16-15P
New -
 W16-16P
Last Exit Before Toll (1-line plaque) -
 W16-16aP
Last Exit Before Toll (2-line plaque) -
 W16-17P
Toll (plaque) -
 W16-18P
Notice -
 W16-19P
Last In Corridor (plaque) -
 W16-20P
Except Bicycles (plaque) -
 W16-21P
2-Way Bicycle Cross Traffic (plaque)
W17 series: Speed humps
W18 series: No traffic signs
W19 series: Freeway or expressway end signs
-
 W19-1
W19-1
Freeway ends (distance) -
 W19-2
W19-2
Expressway ends (distance) -
 W19-3
W19-3
Freeway ends -
 W19-4
W19-4
Expressway ends -
 W19-5
W19-5
All traffic must exit
W20 series: Work zones
-
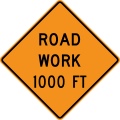 CW20-1
Road work (distance) ahead -
 CW20-1b
Path work (distance) ahead -
 CW20-2
Detour (distance) ahead -
 CW20-2a
Bicycle detour (distance) ahead -
 CW20-3
Road closed (distance) ahead -
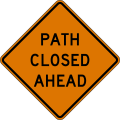 CW20-3a
Path closed (distance) ahead -
 CW20-4
One lane road (distance) ahead -
 CW20-5R
Right lane closed (distance) ahead -
 CW20-5aR
2 right lanes closed (distance) ahead -
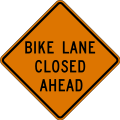 CW20-5b
Bike lane closed (distance) ahead -
 CW20-7
Flagger ahead (symbol sign) -
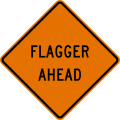 CW20-7a
Flagger ahead (text sign) -
 CW20-8
Slow (stop/slow paddle) -
 R1-1
R1-1
Stop (stop/slow paddle)
W21 series: Road work
-
 CW21-1
Workers (symbol sign) -
 CW21-1a
Workers (text sign) -
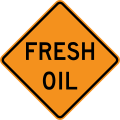 CW21-2
Fresh oil (tar) -
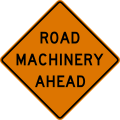 CW21-3
Road machinery (distance) ahead -
 CW21-4
Slow moving vehicle -
 CW21-5
Shoulder work -
 CW21-5aR
Right Shoulder Closed -
 CW21-5bR
Right Shoulder Closed (distance) ahead -
 CW21-6
Survey crew -
 CW21-7
Utility work (distance) ahead -
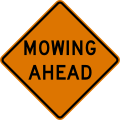 CW21-8
Mowing (distance) ahead
W22 series: Blasting zones
W23 series: Slow traffic
-
 CW23-1
Slow traffic ahead -
 W23-2
W23-2
New traffic pattern ahead -
 CW23-2
New traffic pattern ahead -
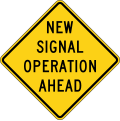 W23-2a
New Signal Operation Ahead
W24 series: Lane shifts
-
 CW24-1R
Double reverse curve (right) (1 lane) -
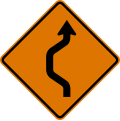 CW24-1L
Double reverse curve (left) (1 lane) -
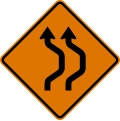 CW24-1aR
Double reverse curve (right) (2 lanes) -
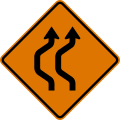 CW24-1aL
Double reverse curve (left) (2 lanes) -
 CW24-1bR
Double reverse curve (right) (3 lanes) -
 CW24-1bL
Double reverse curve (left) (3 lanes) -
 CW24-1cP
All lanes
W25 series: Oncoming traffic has extended green
W26 series: Watch for stopped traffic
Object markers
-
 OM1-1
OM1-1
Object Marker -
 OM1-2
OM1-2
Object Marker -
 OM1-3
OM1-3
Object Marker -
 OM2-1V
Vertical Culvert Marker -
 OM2-2V
Vertical Culvert Marker -
 OM2-1H
Horizontal Culvert Marker -
 OM2-2H
Horizontal Culvert Marker -
 OM3-L
OM3-L
Left Object Marker -
 OM3-C
OM3-C
Chevron Object Marker -
 OM3-R
OM3-R
Right Object Marker -
 OM4-1
OM4-1
End Of Road Marker -
 OM4-2
OM4-2
End Of Road Marker -
 OM4-3
OM4-3
End Of Road Marker
Route marker signs
M1 series: Route shields
-
 M1-1
M1-1
Interstate Route Marker (2 digits) -
 M1-1
M1-1
Interstate Route Marker (3 digits) -
 M1-1a
M1-1a
Interstate Route Marker with State (2 digits) -
 M1-1a
M1-1a
Interstate Route Marker with state (3 digits) -
 M1-2
M1-2
Off interstate business route marker (loop) (2 digits) -
 M1-2
M1-2
Off interstate business route marker (loop) (3 digits) -
 M1-3
M1-3
Off interstate business route marker (spur) (2 digits) -
 M1-3
M1-3
Off interstate business route marker (spur) (3 digits) -
 M1-4
M1-4
US route marker (2 digits) -
 M1-4
M1-4
US route marker (3 digits) -
 M1-5
M1-5
State Route Marker (2 digits) -
 M1-5
M1-5
State Route Marker (3 digits) -
 M1-6
M1-6
County Route Marker -
 M1-7
M1-7
Forest Route -
 M1-8
M1-8
State or local Bicycle Route -
 M1-8a
M1-8a
State or local Bicycle route -
 M1-8b
M1-8b
Non-numbered bicycle route (2 lines) -
 M1-8c
M1-8c
Non-numbered bicycle route (3 lines) -
 M1-9
M1-9
U.S. bicycle route -
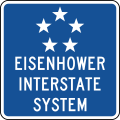 M1-10
M1-10
Eisenhower interstate system -
 M1-10a
Eisenhower interstate system
M2 series: Junction markers
M3 series: Cardinal direction markers
-
 M3-1P
M3-1P
Cardinal Direction - North (plaque) -
 M3-2P
M3-2P
Cardinal Direction - East (plaque) -
 M3-3P
M3-3P
Cardinal Direction - South (plaque) -
 M3-4P
M3-4P
Cardinal Direction - West (plaque)
M4 series: Route marker auxiliaries
-
 M4-1P
M4-1P
Alternate (plaque) -
 M4-1aP
Alt (plaque) -
 M4-2P
M4-2P
By-Pass (plaque) -
 M4-3P
M4-3P
Business (plaque) -
 M4-4P
M4-4P
Truck (plaque) -
 M4-5P
M4-5P
To (plaque) -
 M4-6P
M4-6P
End (plaque) -
 M4-7P
M4-7P
Temporary (plaque) -
 M4-7aP
Temp (plaque) -
 M4-8P
M4-8P
Detour (plaque) -
 M4-8a
M4-8a
End detour -
 M4-8bP
End (plaque) (if a road work blocked road) -
 M4-9R
M4-9R
Detour Right Arrow -
 M4-9L
M4-9L
Detour Left Arrow -
 M4-9aR
Bicycle and Pedestrian Detour Right Arrow -
 M4-9aL
Bicycle and Pedestrian Detour Left Arrow -
 M4-9bR
Pedestrian Detour Right Arrow -
 M4-9bL
Pedestrian Detour Left Arrow -
 M4-9cR
Bicycle Detour Right Arrow -
 M4-9cL
Bicycle Detour Left Arrow -
 M4-10R
Detour Right Arrow -
 M4-10L
Detour Left Arrow -
 M4-11
M4-11
Emergency Route -
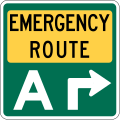 M4-11a
Emergency Route -
 M4-11bP
Emergency Route To (Plaque) -
 M4-11cP
Emergency Route To (Plaque) -
 M4-12
M4-12
End Emergency Route -
 M4-14P
Begin (Plaque) -
 M4-17
M4-17
Toll Collector Symbol Panel -
 M4-18
M4-18
Exact Change Symbol Panel
M5 series: Advance turn arrow auxiliary signs
-
 M5-1PR
Advance Right Turn Arrow (90 Degree Angle) -
 M5-1PL
Advance Left Turn Arrow (90 Degree Angle) -
 M5-2PR
Advance Right Turn Arrow (45 Degree Angle) -
 M5-2PL
Advance Left Turn Arrow (45 Degree Angle) -
 M5-3PR
Advance Right Turn Arrow (Circular Intersection) -
 M5-3PL
Advance Left Turn Arrow (Circular Intersection) -
 M5-4P
M5-4P
Lane Designation - Left Lane (Plaque) -
 M5-5P
M5-5P
Lane Designation - Center Lane (Plaque) -
 M5-6P
M5-6P
Lane Designation - Right Lane (Plaque)
M6 series: Directional arrow auxiliary signs
-
 M6-1PR
Right Directional Arrow -
 M6-1PL
Left Directional Arrow -
 M6-2PR
Diagonal Right Directional Arrow -
 M6-2PL
Diagonal Left Directional Arrow -
 M6-2aPR
Downward Diagonal Right Directional Arrow -
 M6-2aPL
Downward Diagonal Left Directional Arrow -
 M6-3P
M6-3P
Straight Directional Arrow -
 M6-4P
M6-4P
Double Directional Arrow -
 M6-5PR
Double Diagonal Right Directional Arrow -
 M6-5PL
Double Diagonal Left Directional Arrow -
 M6-6PR
Straight And Right Directional Arrow -
 M6-6PL
Left And Straight Directional Arrow -
 M6-7PR
Straight And Diagonal Right Directional Arrow -
 M6-7PL
Diagonal Left And Straight Directional Arrow
M10 series: Scenic area
-
 M10-1
M10-1
National Scenic Byway -
 M10-1aP
National Scenic Byway (plaque) -
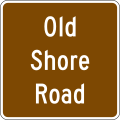 M10-2
M10-2
Byway identification -
 M10-2aP
Byway identification (plaque) -
 M10-3
M10-3
State scenic byway system -
 M10-3a
State scenic byway system - simple graphic and byway identification -
 M10-3bP
Scenic byway (plaque)
M11 series: National Historic Trails
-
 M11-1
M11-1
National Historic Trail - Identification -
 M11-1aP
National Historic Trail - Historic Route (plaque) -
 M11-1bP
National Historic Trail - Crossing (plaque) -
 M11-1cP
National Historic Trail - Auto Tour Route (Plaque) -
 M11-1dP
National Historic Trail - Distance (plaque)
Destination signs
D1 series: Destination
-
 D1-1
D1-1
Destination (1-line) -
 D1-1a
D1-1a
Destination and Distance (1-line) -
 D1-1b
D1-1b
Bicycle Destination (1-line) -
 D1-1c
D1-1c
Bicycle Destination and Distance (1-line) -
 D1-1d
D1-1d
Destination (Circular Intersection) (1-line) -
 D1-1e
D1-1e
Destination with route shield (Circular Intersection) (1-line) -
 D1-2
D1-2
Destination (2-lines) -
 D1-2a
D1-2a
Destination and Distance (2-line) -
 D1-2b
D1-2b
Bicycle Destination (2-line) -
 D1-2c
D1-2c
Bicycle Destination and Distance (2-line) -
 D1-2d
D1-2d
Destination (Circular Intersection) (2-lines) -
 D1-3
D1-3
Destination (3-lines) -
 D1-3a
D1-3a
Destination and Distance (3-lines) -
 D1-3b
D1-3b
Bicycle Destination (3-line) -
 D1-3c
D1-3c
Bicycle Destination and Distance (3-lines) -
 D1-3d
D1-3d
Destination (Circular Intersection) (3-lines) -
 D1-5
D1-5
Circular Intersection Destination (Diagrammatic) -
 D1-5a
D1-5a
Circular Intersection Destination (Diagrammatic)
D2 series: Distance
-
 D2-1
D2-1
Distance (1-line) -
 D2-1a
D2-1a
Bicycle Distance (1-line) -
 D2-2
D2-2
Distance (2-lines) -
 D2-2a
D2-2a
Bicycle Distance (2-lines) -
 D2-3
D2-3
Distance (3-lines) -
 D2-3a
D2-3a
Bicycle Distance (3-lines)
D3 series: Street name
-
 D3-1
D3-1
Street Name -
 D3-1a
D3-1a
Street Name with route shield -
 D3-2
D3-2
Advance street name (2-lines) -
 D3-2
D3-2
Advance street name (3-lines) -
 D3-2
D3-2
Advance street name (3-lines) -
 D3-2
D3-2
Advance street name (4-lines)
D4 series: Parking
-
 D4-1
D4-1
Parking area -
 D4-2
D4-2
Park - Ride -
 D4-3
D4-3
Bicycle parking area -
 D4-4
D4-4
Bicycle-sharing station -
 D4-4a
D4-4a
Bicycle lockers
D5 series: Rest area
-
 D5-1
D5-1
Rest area (distance) -
 D5-1a
D5-1a
Rest area next right -
 D5-2
D5-2
Rest area (diagonal right arrow) -
 D5-2a
D5-2a
Rest area gore -
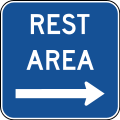 D5-5
D5-5
Rest area -
 D5-6
D5-6
Next rest area (distance) miles -
 D5-7
D5-7
Rest area - tourist info center (distance) -
 D5-7a
D5-7a
Rest area - tourist info center next right -
 D5-8
D5-8
Rest area - tourist info center (diagonal right arrow) -
 D5-9
D5-9
Parking area (distance) -
 D5-9a
D5-9a
Parking area (diagonal right arrow) -
 D5-9b
D5-9b
Parking area gore -
 D5-10
D5-10
Picnic area (distance) -
 D5-10a
Picnic area (diagonal right arrow) -
 D5-10b
Picnic area gore -
 D5-11
D5-11
Scenic area (distance) -
 D5-11a
Scenic area (diagonal right arrow) -
 D5-11b
Scenic area gore -
 D5-12
D5-12
Interstate oasis -
 D5-12aP
Interstate oasis (plaque) -
 D5-12b
Interstate oasis -
 D5-13
D5-13
Brake check area (distance) -
 D5-14
D5-14
Brake check area (diagonal right arrow) -
 D5-15
D5-15
Chain-up area (distance) -
 D5-16
D5-16
Chain-up area (diagonal right arrow)
D8 series: Weigh station
-
 D8-1
D8-1
Weigh station (distance) -
 D8-1a
D8-1a
Weigh station ahead -
 D8-2
D8-2
Weigh station next right -
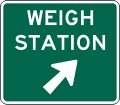 D8-3
D8-3
Weigh station (diagonal right arrow)
D10 series: Reference location
-
 D10-1
D10-1
Reference location (1 digit) -
 D10-1a
Intermediate reference location (1 digit) -
 D10-2
D10-2
Reference location (2 digit) -
 D10-2a
Intermediate reference location (2 digit) -
 D10-3
D10-3
Reference location (3 digit) -
 D10-3a
Intermediate reference location (3 digit) -
 D10-4
D10-4
Enhanced reference location -
 D10-5
D10-5
Intermediate enhanced reference location
D11 series: Bicycle facility and shared-use path
-
 D11-1
D11-1
Bike route -
 D11-1bP
Bike route (plaque) -
 D11-1c
Bike route with destination -
 D11-10a
Shared-use path destination (1-line) -
 D11-10b
Shared-use path destination (2-lines) -
 D11-10c
Shared-use path destination (3-lines) -
 D11-10d
Shared-use path destination and distance (1-line) -
 D11-10e
Shared-use path destination and distance (2-lines) -
 D11-10f
Shared-use path destination and distance (3-lines) -
 D11-11
Bicycles permitted -
 D11-12
Pedestrians permitted -
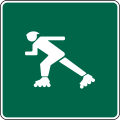 D11-13
Skaters permitted -
 D11-14
Equestrians permitted -
 D11-20
Bicycle left turn may use turn box -
 D11-20a
Bicycle left turn box
D12 series: Radio, telephone and carpool information
-
 D12-1
D12-1
Radio-Weather information -
 D12-1a
Radio-Traffic information -
 D12-1bP
Urgent message when flashing (plaque) -
 D12-2
D12-2
Carpool information -
 D12-3
D12-3
Channel 9 monitored -
 D12-4
D12-4
Emergency call 911 -
 D12-5
D12-5
Travel info call 511 (pictograph) -
 D12-5a
Travel info call 511 -
 D12-6
D12-6
Roadside assistance
D13 series: Crossover and freeway entrance
D15 series: Combination lane use/destination
-
 D15-1
D15-1
Combination lane use/destination with route shield -
 D15-1
D15-1
Combination lane use/destination with street name
D17 series: Truck lane and slow vehicle signs
-
 D17-1
D17-1
Next truck lane (distance) -
 D17-2
D17-2
Truck lane (distance) -
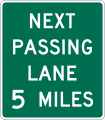 D17-3
D17-3
Next passing lane (distance) -
 D17-4
D17-4
Passing lane (distance) -
 D17-5
D17-5
Emergency turn-out (distance) -
 D17-6
D17-6
Emergency turn-out directional -
 D17-7
D17-7
Slow vehicle turn-out (distance)
Construction information signs
-
 G20-1
G20-1
Road work next (distance) miles -
 G20-2
G20-2
Road work ends -
 G20-4
G20-4
Pilot car follow me -
 G20-5aP
Work zone (plaque)
Motorist services
-
 D9-1
D9-1
Telephone -
 D9-2
D9-2
Hospital -
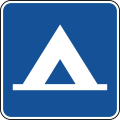 D9-3
D9-3
Camping -
 D9-4
D9-4
Litter container -
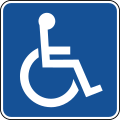 D9-6
D9-6
Handicapped accessible -
 D9-6P
D9-6P
Van accessible (plaque) -
 D9-7
D9-7
Gasoline -
 D9-8
D9-8
Food -
 D9-9
D9-9
Lodging -
 D9-10
D9-10
Tourist information -
 D9-11
D9-11
Diesel fuel -
 D9-11a
Alternative fuel (compressed natural gas) -
 D9-11b
Electric vehicle charging -
 D9-11bP
Electric vehicle charging (plaque) -
 D9-11c
Alternative fuel (ethanol) -
 D9-11d
Alternative fuel (liquified natural gas) -
 D9-11e
Alternative fuel (liquified petroleum gas) -
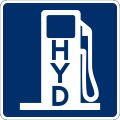 D9-11f
Alternative fuel (hydrogen) -
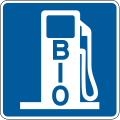 D9-11g
Alternative fuel (biofuel) -
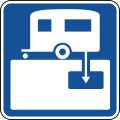 D9-12
D9-12
RV sanitary station -
 D9-13
D9-13
Emergency medical services -
 D9-13aP
Hospital (plaque) -
 D9-13bP
Ambulance station (plaque) -
 D9-13cP
Emergency medical care (plaque) -
 D9-13dP
Trauma center (plaque) -
 D9-14
D9-14
Police -
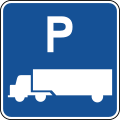 D9-16
D9-16
Truck parking -
 D9-16aP
Truck external power (plaque) -
 D9-16b
Truck parking availability - exit number -
 D9-16c
Truck parking availability - distance -
 D9-16c
Truck parking availability - distance -
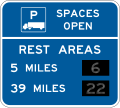 D9-16d
Truck parking availability - rest area -
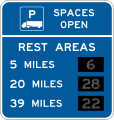 D9-16d
Truck parking availability - rest area -
 D9-16e
Truck parking availability - combined -
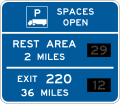 D9-16e
Truck parking availability - combined -
 D9-16e
Truck parking availability - combined -
 D9-16e
Truck parking availability - combined -
 D9-17P
Next services (distance) (plaque) -
 D9-17a
Next EV charging (distance) -
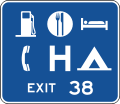 D9-18
D9-18
General services (up to 6 symbols) with exit number -
 D9-18a
General services with exit number -
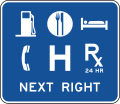 D9-18b
General services (up to 6 symbols) with action message -
 D9-18c
General services with action message -
 D9-18dP
Rural interchange general services (up to 3 symbols) (plaque) -
 D9-18eP
Rural interchange general services (1 line) (plaque) -
 D9-18fP
Rural interchange general services (2 lines) (plaque) -
 D9-19
D9-19
Alternative fuels corridor -
 D9-19aP
Alternative fuels corridor (1 line) (plaque) -
 D9-19bP
Alternative fuels corridor (2 lines) (plaque) -
 D9-20
D9-20
Pharmacy -
 D9-20aP
24 HR (plaque) -
 D9-21
D9-21
Telecommunication (TDD/TYY) -
 D9-22
D9-22
Wireless internet
General information
-
 I1-1
I1-1
Traffic signal speed -
 I2-1
I2-1
State line -
 I2-2
I2-2
River -
 I2-3
I2-3
Grade separation identification (1-line) -
 I2-3
I2-3
Grade separation identification (1-line) -
 I2-3a
I2-3a
Grade separation identification (2-line) -
 I2-3a
I2-3a
Grade separation identification (2-line) -
 I2-4
I2-4
Future interstate corridor -
 I2-4a
I2-4a
Future I-XX Corridor -
 I2-5
I2-5
Project information -
 I2-5
I2-5
Project information -
 I3-5
I3-5
Airport -
 I3-6
I3-6
Bus station -
 I3-7
I3-7
Train station -
 I3-8
I3-8
Light rail station -
 I3-9
I3-9
Vehicle Ferry Terminal -
 I3-10
I3-10
Passenger Only Ferry Terminal -
 I3-10P
Ferry (plaque) -
 I4-1
I4-1
Library -
 I4-2
I4-2
Recycling center -
 I13-1
I13-1
Emergency Notification -
 I13-2
I13-2
Push to Exit -
 I20-1
I20-1
Acknowledgement -
 I20-2
I20-2
Acknowledgement -
 I20-3
I20-3
Acknowledgement -
 I20-4
I20-4
Acknowledgement - Rest area -
 I20-4a
Acknowledgement - Welcome Center -
 I20-5P
Acknowledgement (plaque)
Freeway and expressway signs
E1 series: Exit number
-
 E1-1
E1-1
Interchange Advance Guide (1 Destination) -
 E1-2
E1-2
Interchange Advance Guide (2 Destinations) -
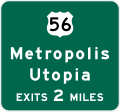 E1-3
E1-3
Interchange Advance Guide (3 Destinations) -
 E1-5P
E1-5P
1 or 2 Digit Exit Number (plaque) -
 E1-5aP
3 Digit Exit Number (plaque) -
 E1-5bP
1 or 2 Digit Exit Number with single letter suffix (plaque) -
 E1-5cP
3 Digit Exit Number with single letter suffix (plaque) -
 E1-5dP
1 or 2 Digit Exit Number with dual letter suffix (plaque) -
 E1-5eP
3 Digit Exit Number with dual letter suffix (plaque) -
 E1-5fP
1 or 2 Digit Left Exit Number (plaque) -
 E1-5gP
3 Digit Left Exit Number (plaque) -
 E1-5hP
1 or 2 Digit Left Exit Number with single letter suffix (plaque) -
 E1-5iP
3 Digit Left Exit Number with single letter suffix (plaque) -
 E1-5jP
1 or 2 Digit Left Exit Number with dual letter suffix (plaque) -
 E1-5kP
3 Digit Left Exit Number with dual letter suffix (plaque) -
 E1-5mP
Left (plaque)
E2 series: Next exit
E4 series: Exit direction
-
 E4-1
E4-1
Exit Direction (1 Destination) -
 E4-2
E4-2
Exit Direction (2 Destinations) -
 E4-3
E4-3
Exit Direction (3 Destinations)
E5 series: Exit gore
-
 E5-1
E5-1
Exit Gore (No Exit Number -
 E5-1a
E5-1a
Exit Gore (1 or 2 Digits) -
 E5-1bP
Exit Number (plaque) -
 E5-1c
E5-1c
Narrow Exit Gore -
 E5-2
E5-2
Exit Open -
 E5-2a
E5-2a
Exit Closed -
 E5-3
E5-3
Exit Only
E6 series: Pull-through
-
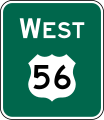 E6-1
E6-1
Pull-Through -
 E6-1a
E6-1a
Pull-Through (Destination) -
 E6-2
E6-2
Pull-Through (Down Arrows) -
 E6-2a
E6-2a
Pull-Through (Destination, Down Arrows)
E7 series: Post-interchange distance
-
 E7-3
E7-3
Post-Interchange Distance (3 lines) -
 E7-4
E7-4
Post-Interchange Travel Time -
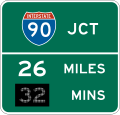 E7-5
E7-5
Distance and Travel Time -
 E7-6
E7-6
Comparative Travel Time
E8 series: Preferential lane entrance, exit, and intermediate egress
-
 E8-1
E8-1
Preferential Lane Entrance Gore -
 E8-1a
E8-1a
Preferantial Lane Intermediate Entrance Gore -
 E8-2
E8-2
Preferential Lane Entrance Direction (Overhead) -
 E8-2a
E8-2a
Preferential Lane Entrance Direction (Post-Mounted) -
 E8-3
E8-3
Preferential Lane Entrance Advance -
 E8-4
E8-4
Preferential Lane Direct Exit Gore -
 E8-5
E8-5
Preferential Lane Intermediate Egress Direction -
 E8-6
E8-6
Preferential Lane Intermediate Egress Advance
E11 series: Panels
-
 E11-1
E11-1
Exit Only (With Arrow) -
 E11-1a
Exit -
 E11-1b
Only -
 E11-1c
Exit Only -
 E11-1d
Exit Only (With Arrow) -
 E11-1e
Exit Only (With 2 Arrows) -
 E11-1f
Exit Only (With 2 Arrows) -
 E11-2
E11-2
Left (Panel)
E13 series: Exit advisory speed
Emergency management signs
-
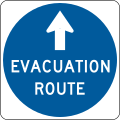 EM1-1
EM1-1
Evacuation route -
 EM1-1a
Hurricane evacuation route -
 EM1-2
EM1-2
Tsunami evacuation route -
 EM2-1
EM2-1
Area Closed -
 EM2-2
EM2-2
Traffic Control Point -
 EM2-3
EM2-3
Maintain Top Safe Speed -
 EM2-4
EM2-4
Road Use Permit Required For Thru Traffic -
 EM3-1
EM3-1
Medical Center -
 EM3-1a
Welfare Center -
 EM3-1b
Registration Center -
 EM3-1c
Decontamination Center -
 EM4-1
EM4-1
Emergency Shelter -
 EM4-1a
Hurricane Shelter -
 EM4-1b
Fallout Shelter -
 EM4-1c
Chemical Shelter
See also
- Comparison of traffic signs in English-speaking countries
- Crosswalks in North America
- Glossary of road transport terms
- Road signs in Canada
- Street signs in Chicago – Street name signs
- Street signs in New York City – Street name signs
- Road signs in Puerto Rico
- Warning sign
Notes
- ^ The legend STATE LAW is optional.
- ^ A fluorescent yellow-green background color may be used instead of yellow for this sign.
- According to the 11th edition of MUTCD, STREET CLOSED (R11-2a), BRIDGE OUT (R11-2b), or PATH CLOSED (R11-2c) signs may be substituted for Road Closed signs where applicable.
- ^ A fluorescent yellow-green background color may be used for this sign.
- ^ The background color (yellow, fluorescent yellow-green or orange) shall match the color of the warning sign that it supplements.
References
- "FHWA Releases New Traffic Control Device Manual with Updates to Improve Safety for Pedestrians, Bicyclists, and All Road Users" (Press release). U.S. Department of Transportation. December 19, 2023. Retrieved December 27, 2023.
- "Frequently Asked Questions - General Questions on the MUTCD". MUTCD. Federal Highway Administration. Retrieved January 29, 2024.
- "MUTCDs & Traffic Control Devices Information by State". Manual on Uniform Traffic Control Devices. Federal Highway Administration. July 14, 2020. Retrieved January 11, 2021.
- Staff. "The Shape—and Color—Give Us a Sign". Federal Highway Administration. Archived from the original on April 1, 2009. Retrieved April 5, 2009.
- "2009 Edition Part 2 Figure 2C-11. Non-Vehicular Warning Signs". Manual on Uniform Traffic Control Devices. United States Department of Transportation. Retrieved June 6, 2012.
External links
 Media related to Road signs in the United States at Wikimedia Commons
| Road signs in the US states by the adoption of MUTCD (2009 edition) | |
|---|---|
| This template lists only US states that have adopted the 2009 edition of MUTCD with their own supplements and states that have adopted their own versions of MUTCD | |
| Adopted MUTCD with the state supplements | |
| Adopted state-specific MUTCD | |
| Road signs in the United States | |
| Traffic signs | |||||||||||||||
|---|---|---|---|---|---|---|---|---|---|---|---|---|---|---|---|
| Signs |
| ||||||||||||||
| By country |
| ||||||||||||||
| Lights | |||||||||||||||
| Typefaces | |||||||||||||||
| International conventions |
| ||||||||||||||
| National standards | |||||||||||||||
| Comparisons | |||||||||||||||
| Road signs in North America | |
|---|---|
| Sovereign states | |
| Dependencies and other territories | |


